12'-6" Catboat by William Garden- Aug 2015
| The Design | Building Decisions | Aug 15, 2015 | Nov 1, 2015 Wheels | ||||
 |  |  |  |
| Dec 5, 2015 | Nov 22, 2016 | Jan 19, 2017 | |||
 |  |  |
Building Log - August 2015
Aug 15th - Ordered the plans and started the web page.
Aug 27th - Constructed 4x16 foot raised lofting board. Sanded and coated with white latex paint.

Sept 4th - Lofted the Garden lines and mold sections. For reasons explained in Building Decisions, I modified the lines to allow 12 percent deadrise through the mid section and decided to mount the molds on a raised platform, suspended by large octagonal wheels on each end.
Oct 11th - Decided on a 30" x 18" x 14 ft. box to mount the molds on. Roughed out mold plan on lofting board and calculated materials for molds, transom, ribs, ribbands, rudder, centerboard, box and wheels.
Aug 27th - Constructed 4x16 foot raised lofting board. Sanded and coated with white latex paint.
Sept 4th - Lofted the Garden lines and mold sections. For reasons explained in Building Decisions, I modified the lines to allow 12 percent deadrise through the mid section and decided to mount the molds on a raised platform, suspended by large octagonal wheels on each end.
Oct 11th - Decided on a 30" x 18" x 14 ft. box to mount the molds on. Roughed out mold plan on lofting board and calculated materials for molds, transom, ribs, ribbands, rudder, centerboard, box and wheels.
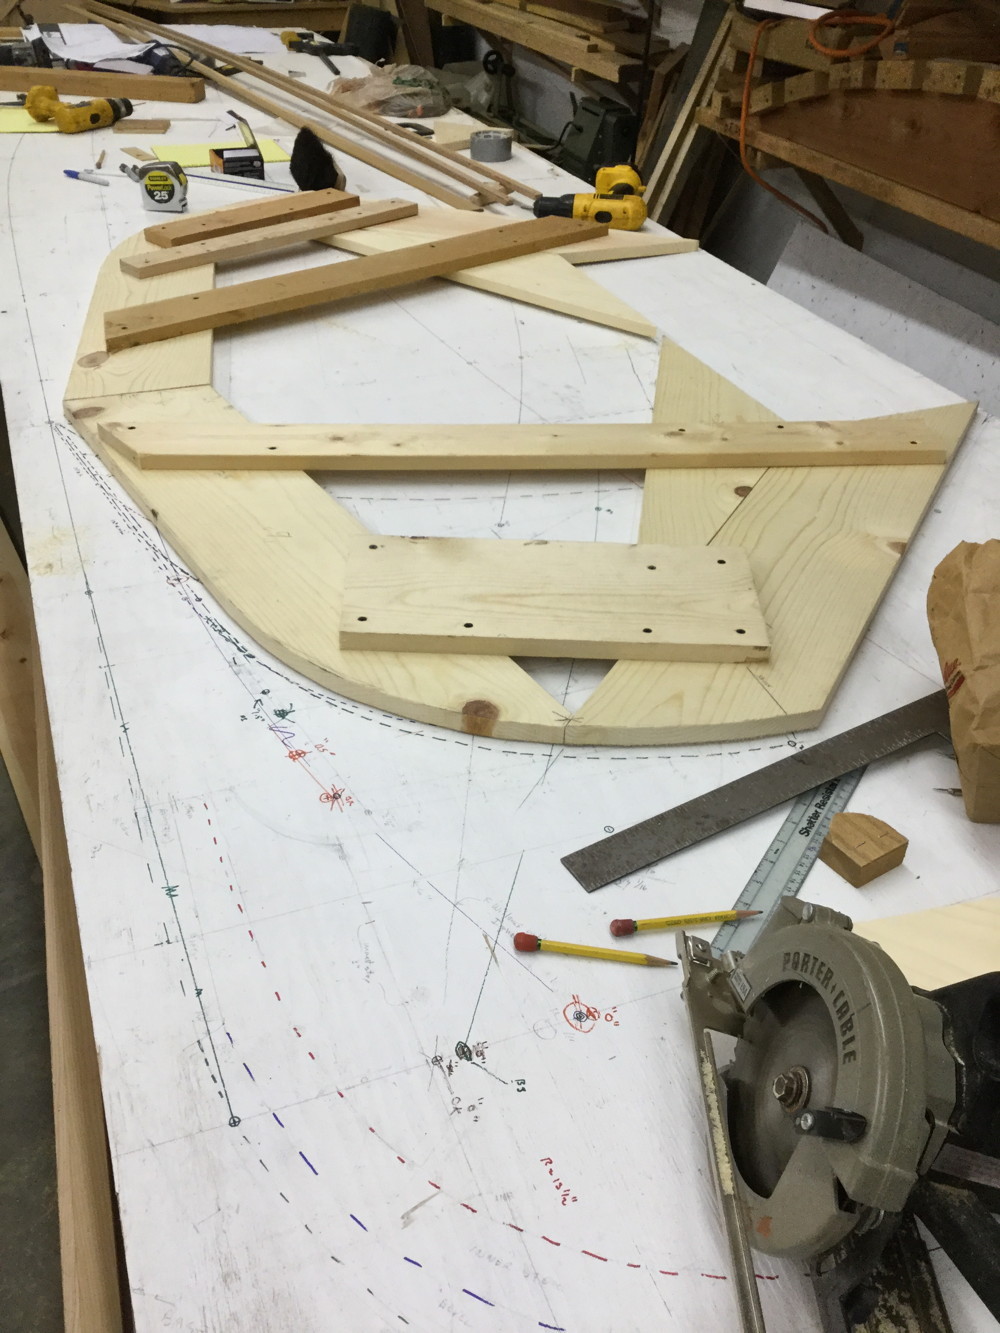
Oct 13th - Fabricated Garden's transom mold.

Oct 16-17th - Bought pine for the molds, plywood for the box and WR Cedar for the planking. Completed the five frame mold pairs. Lofted octagonal wheels.
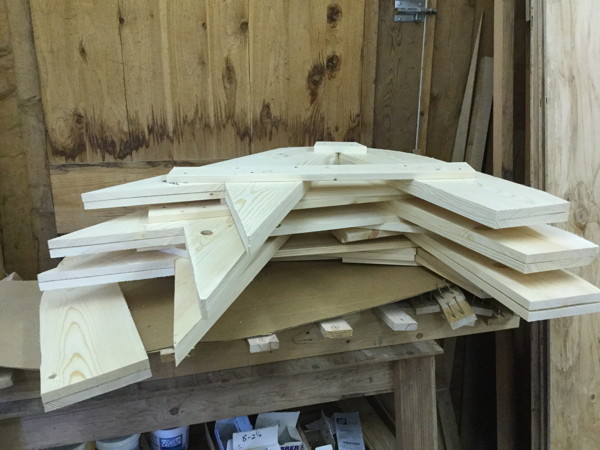
Oct 16-17th - Bought pine for the molds, plywood for the box and WR Cedar for the planking. Completed the five frame mold pairs. Lofted octagonal wheels.
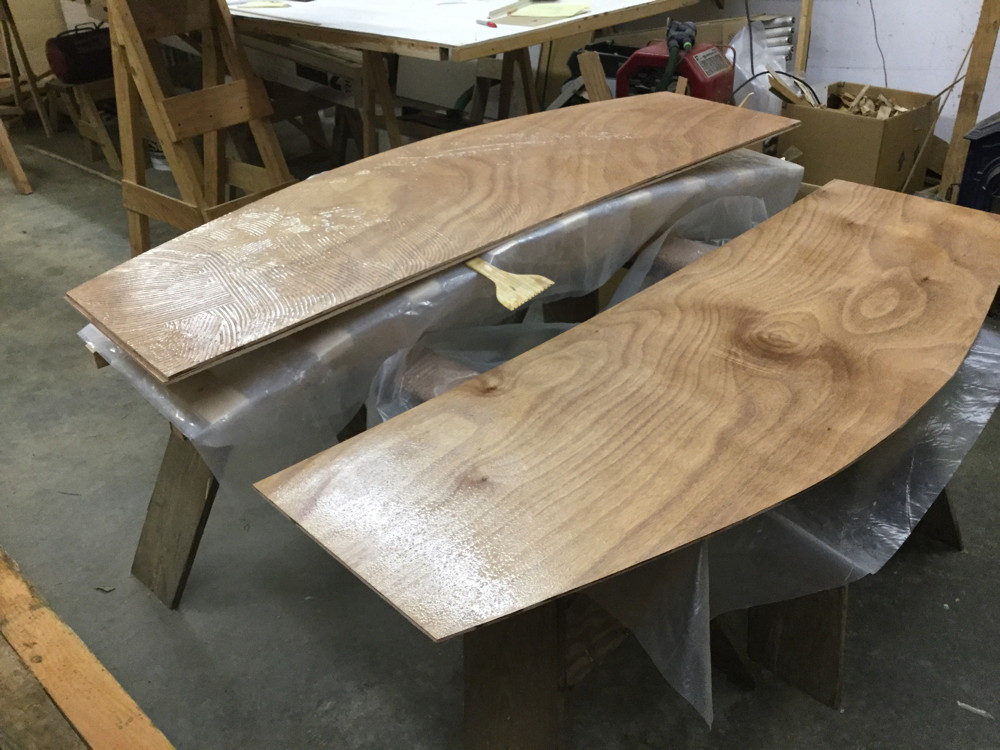
Oct 23-29th - Purchased bending oak for the stem and okoume for the transom. Milled twelve 1/4" x 1 3/4" x 60" strips from one edge of my 10 foot plank of white oak. Cut three pieces of 1/4" okoume and epoxied them over Gardens transom mold.
I steamed ten oak strips in the steam box and easily bent them and clamped them on the stem mold.
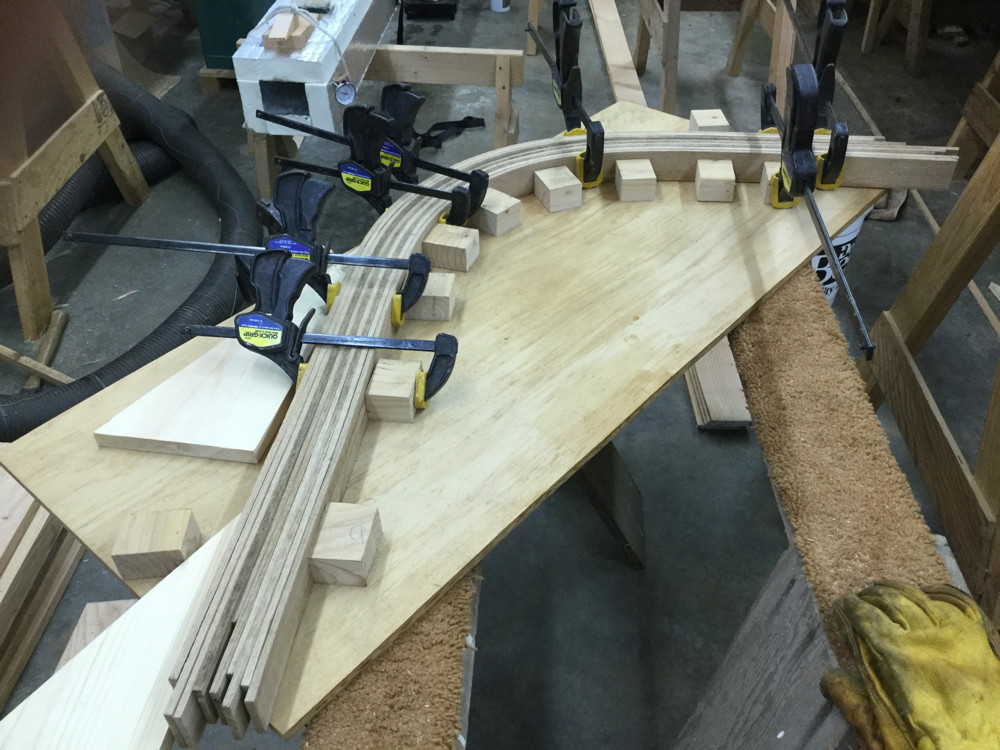
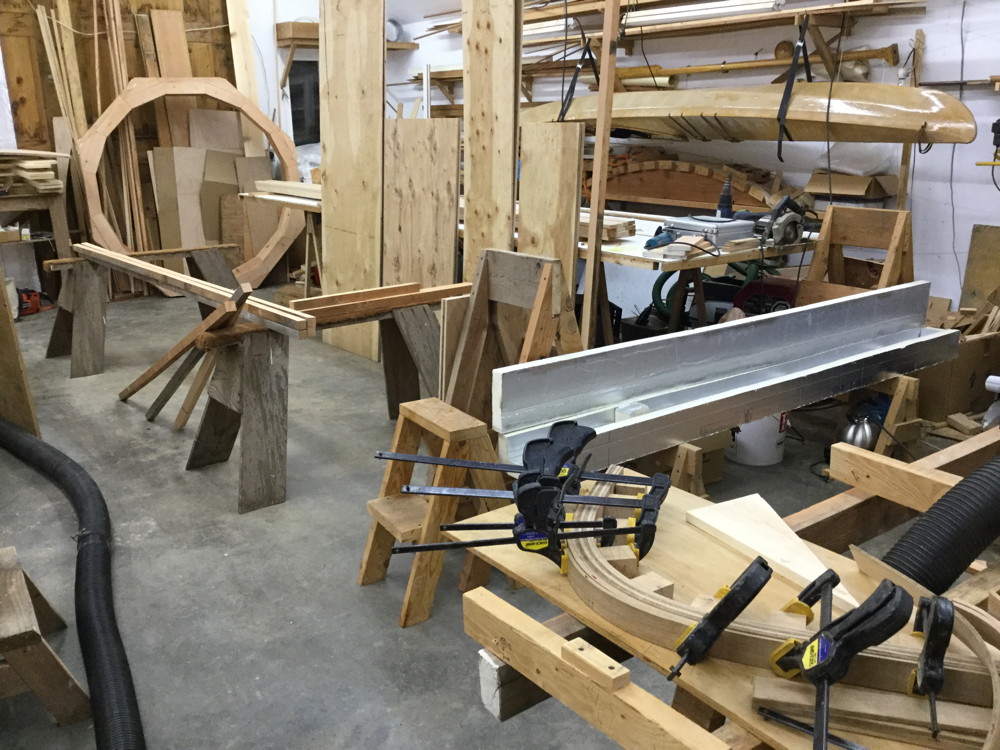
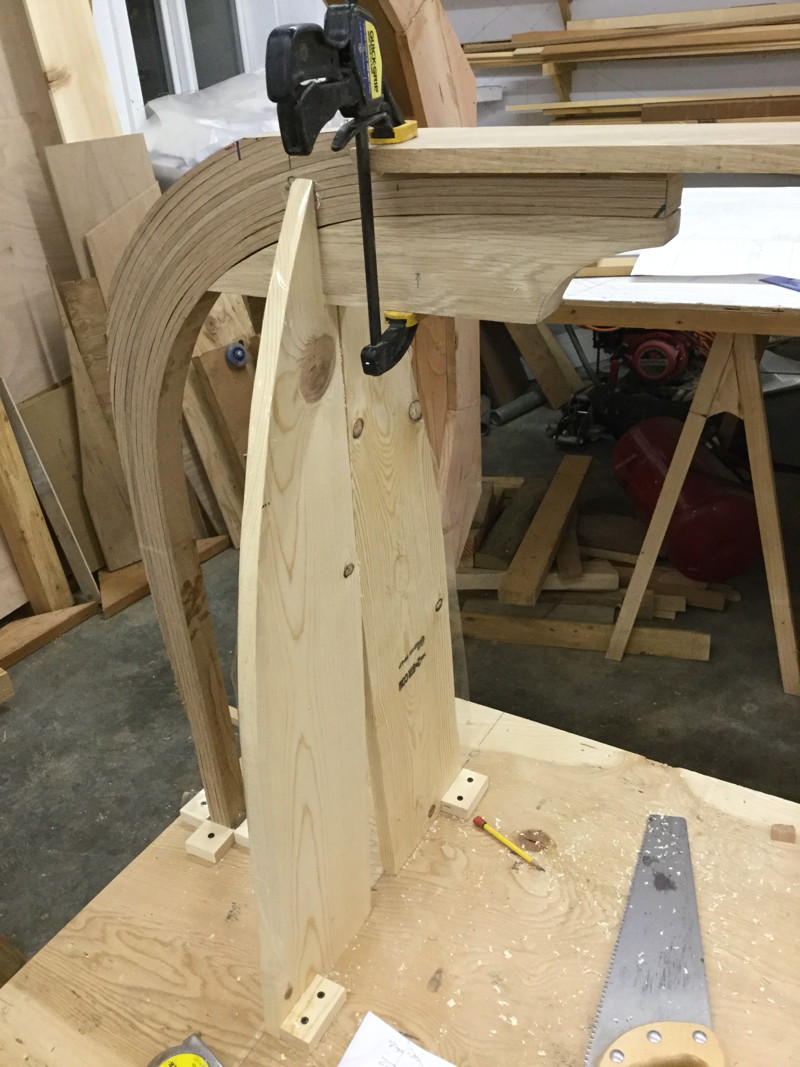
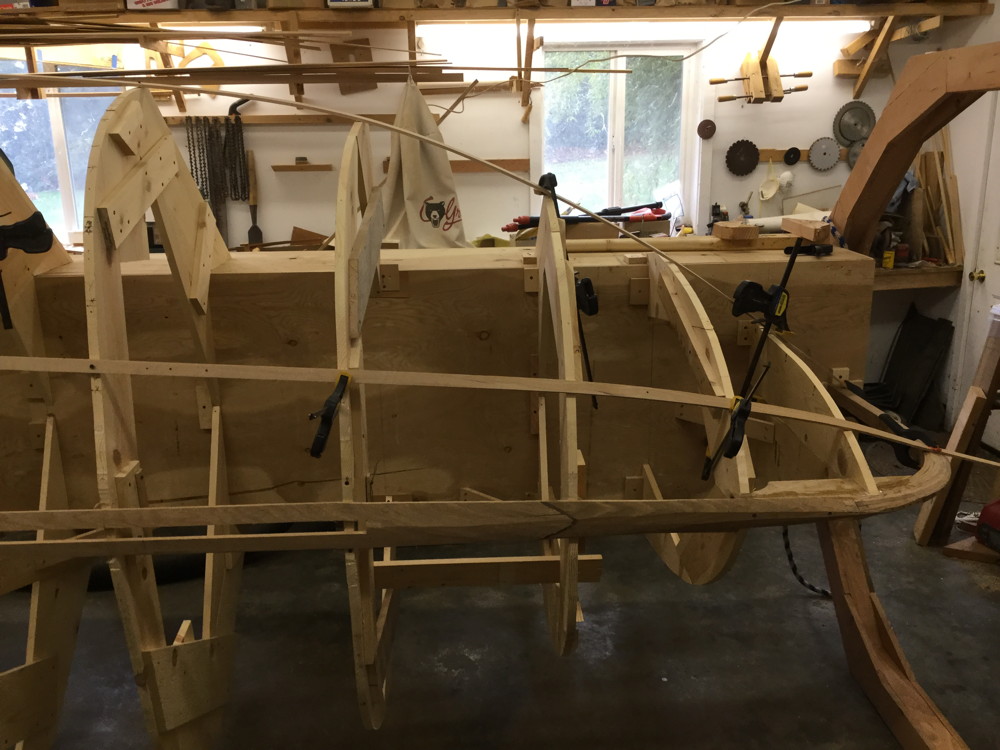
Nov 30th - Epoxied and clamped the laminations to the stem bending mold. I had allowed for a tiny bit of spring back, but with ten laminations it's basically zero. Note the steam box and the first of the two end wheels at the other end of the shop.
Dec 5th - I cleaned up the stem after the epoxy job using the jointer, positioned it with the molds and sprung a ribband down the keel line.

Dec 12-18th - Lofted the transom knee and mast step and cut from oak.
Milled pieces for the apron and have those plus pieces for the transom knee drying by the wood stove to be epoxied. (This is bending oak and isn't particulary dry so I at least wanted to get the surfaces as dry as I could before using epoxy on it.)
Epoxied the knee pieces and the scarf in the apron. Scaled mast step from drawing, cut from oak, and cut the mortice.
Planed apron down to basic size. It will taper down more where it meets the stem, will have bevels cut for the planking and a notch for the centerboard. Also cleaned up the knee.
Made pattern for apron, cut stem where it fits with apron, clamped stem, mast step, pattern and knee together with transom propped against knee.
Fit transom and knee to apron and built mold supports for transom. All three pieces are screwed together with #10 bronze screws which I will use instead of clamps when I epoxy them together.
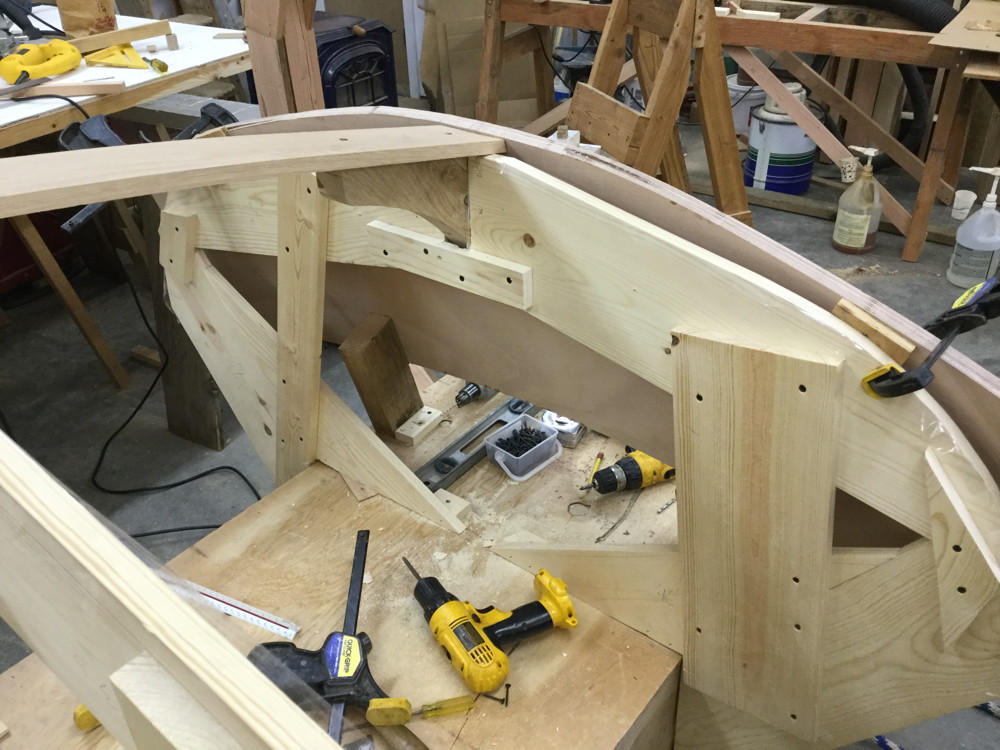
Fit stem and mast step to apron. Covered all the mold surfaces with clear mailing tape, so it's ready for bronze screws and epoxy.
Dec 24th - Trimmed stem so apron is level and cut tapers on the apron. Tried the ribbands and found that 2" wide hemlock is way too stiff to lie flat on the molds. I ripped a few to half width and that seems to work better.
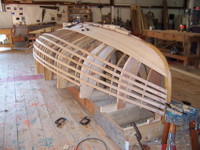
Nov 2nd - The added molds are finally in place and I'm back to beveling for the planking.
Nov 13th - Beveling is complete for apron and the joining parts of the transom and stem.
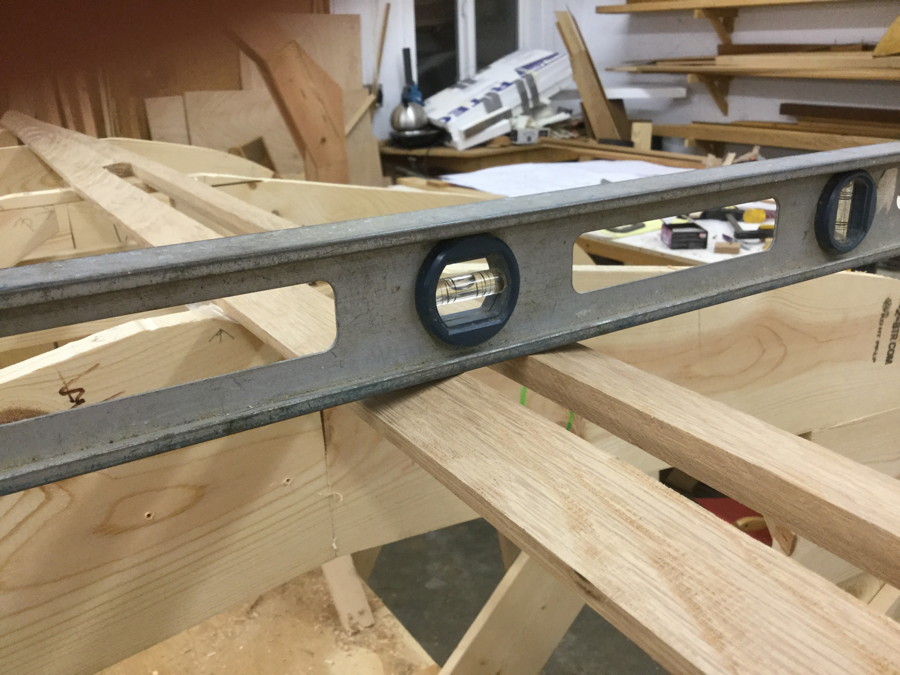
Deadrise is adjusted to 12 degrees on each frame.

Top Return to Al's Boating Index
I steamed ten oak strips in the steam box and easily bent them and clamped them on the stem mold.
Nov 30th - Epoxied and clamped the laminations to the stem bending mold. I had allowed for a tiny bit of spring back, but with ten laminations it's basically zero. Note the steam box and the first of the two end wheels at the other end of the shop.
Dec 5th - I cleaned up the stem after the epoxy job using the jointer, positioned it with the molds and sprung a ribband down the keel line.
Dec 12-18th - Lofted the transom knee and mast step and cut from oak.
Milled pieces for the apron and have those plus pieces for the transom knee drying by the wood stove to be epoxied. (This is bending oak and isn't particulary dry so I at least wanted to get the surfaces as dry as I could before using epoxy on it.)
Epoxied the knee pieces and the scarf in the apron. Scaled mast step from drawing, cut from oak, and cut the mortice.
Planed apron down to basic size. It will taper down more where it meets the stem, will have bevels cut for the planking and a notch for the centerboard. Also cleaned up the knee.
Made pattern for apron, cut stem where it fits with apron, clamped stem, mast step, pattern and knee together with transom propped against knee.
Fit transom and knee to apron and built mold supports for transom. All three pieces are screwed together with #10 bronze screws which I will use instead of clamps when I epoxy them together.
Fit stem and mast step to apron. Covered all the mold surfaces with clear mailing tape, so it's ready for bronze screws and epoxy.
Dec 24th - Trimmed stem so apron is level and cut tapers on the apron. Tried the ribbands and found that 2" wide hemlock is way too stiff to lie flat on the molds. I ripped a few to half width and that seems to work better.
****** 2016 ******
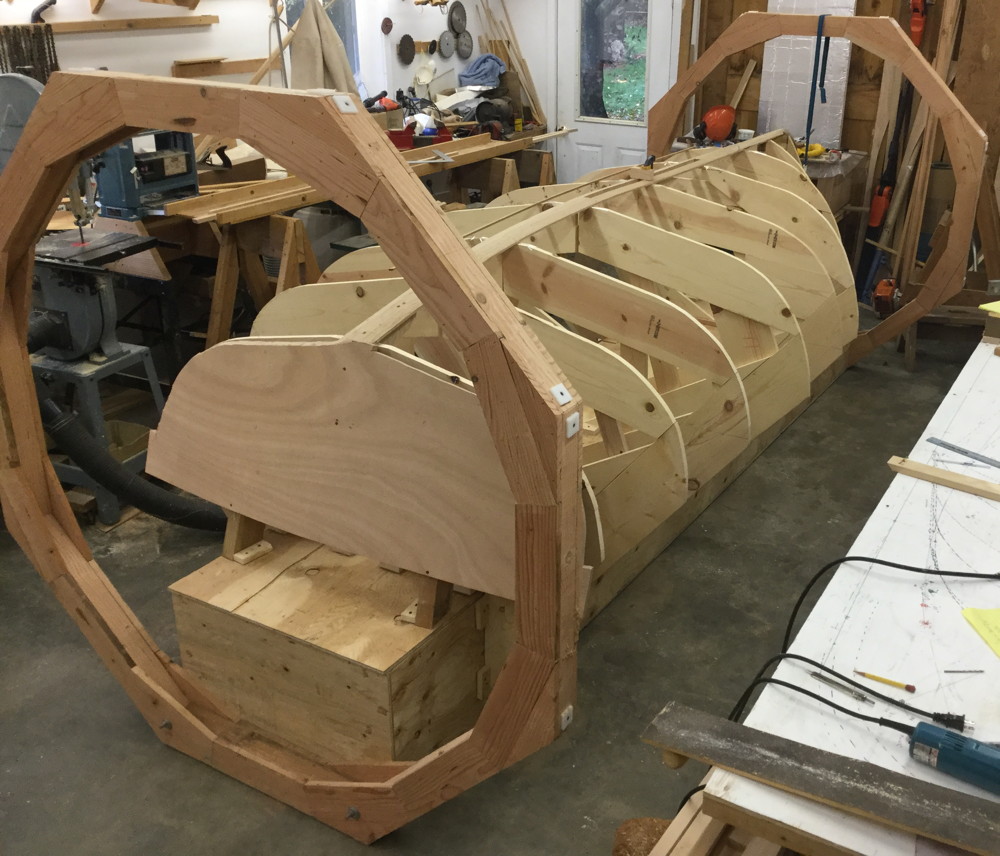
Oct 6th - Other events prevented me from doing any work on the project for the past 8 months, but I had plenty of time to think. That resulted in my deciding to not install ribs at all and plank to the molds. Lofting out and building the additional four molds went quickly.
Nov 13th - Beveling is complete for apron and the joining parts of the transom and stem.
Deadrise is adjusted to 12 degrees on each frame.
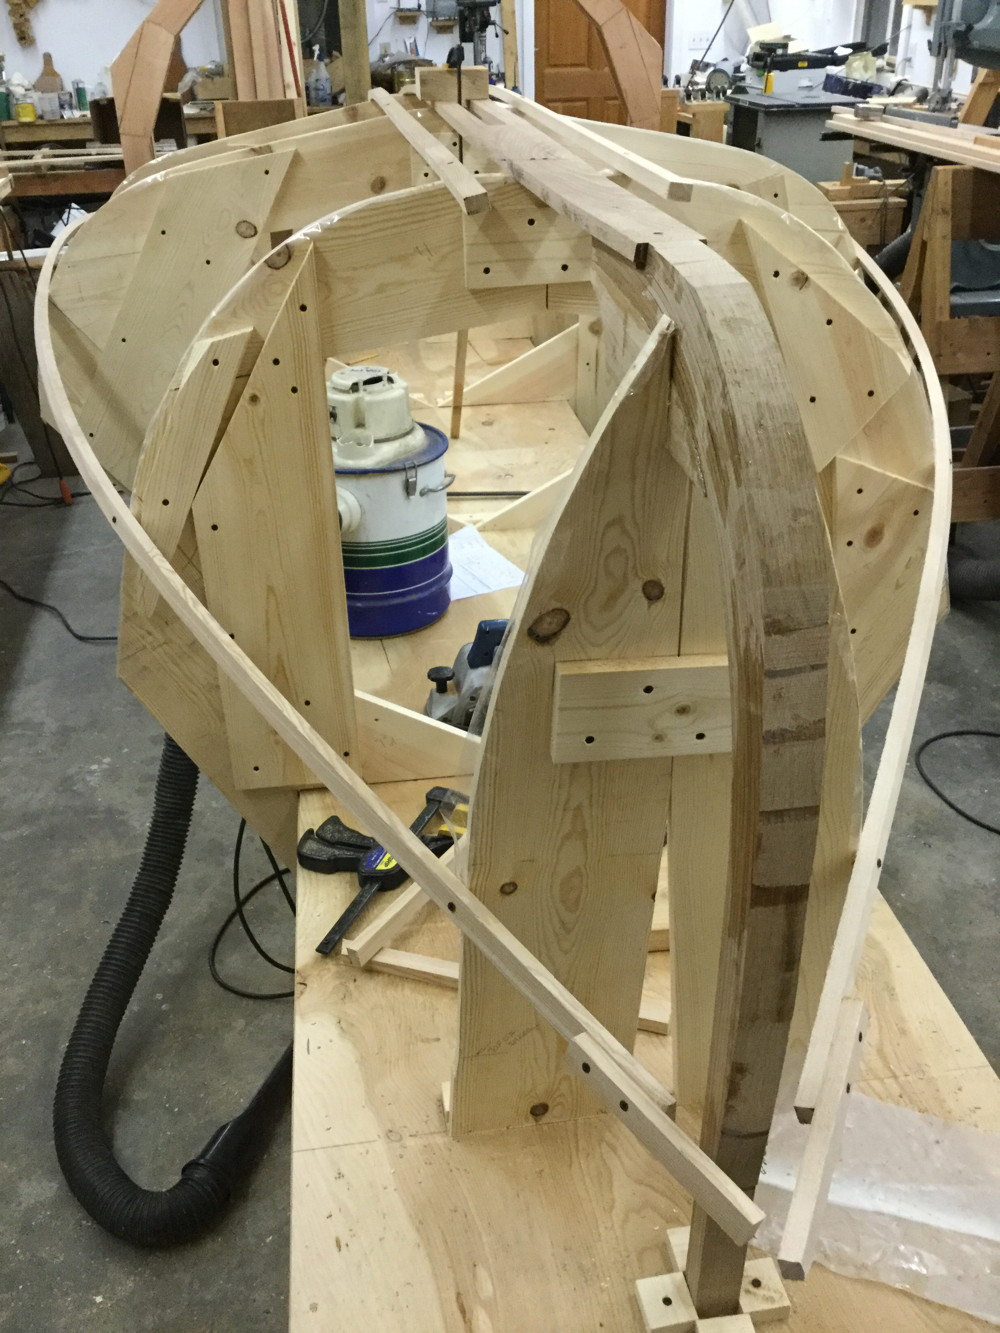
Nov 14th - Tweaking the molds to get the fairest fit for the planks. In this case I tilted frame "0.5" so the battens both lie fair with "0" and "1".
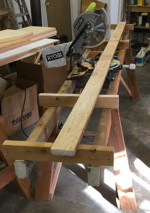
Nov 22nd, 2016 - Started milling the first layer of strips. Six boards cut to width, and the top board cut to rough thickness. The strips will each be run through the planer, then twice through the router to cut in the bead and cove.
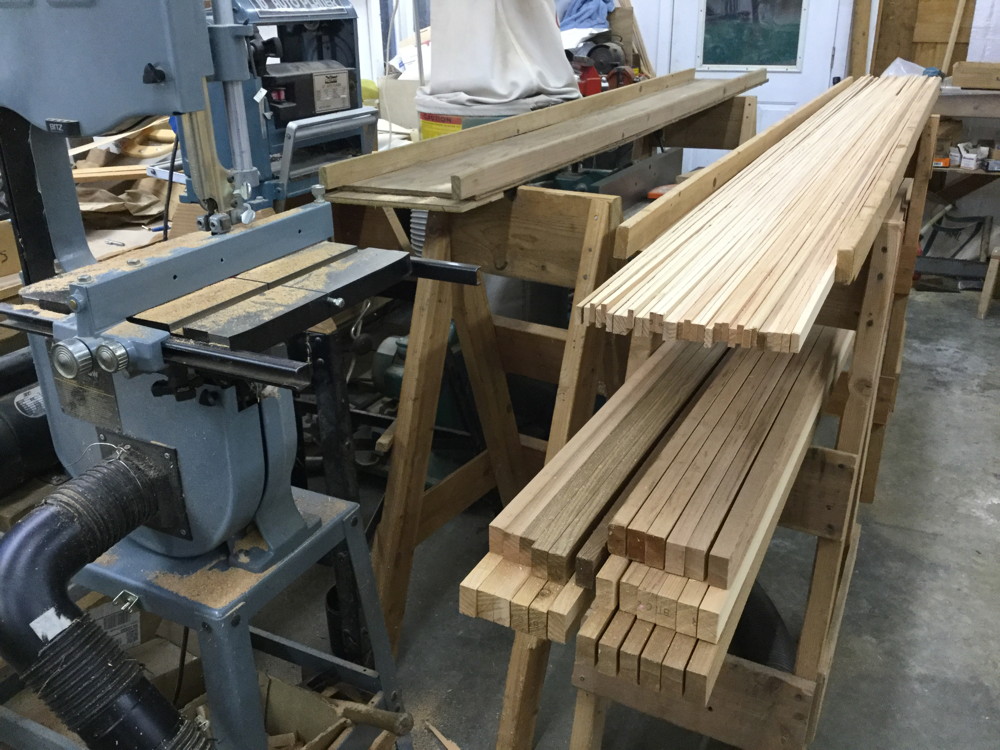
Nov 22nd, 2016 - Started milling the first layer of strips. Six boards cut to width, and the top board cut to rough thickness. The strips will each be run through the planer, then twice through the router to cut in the bead and cove.
****** 2017 ******
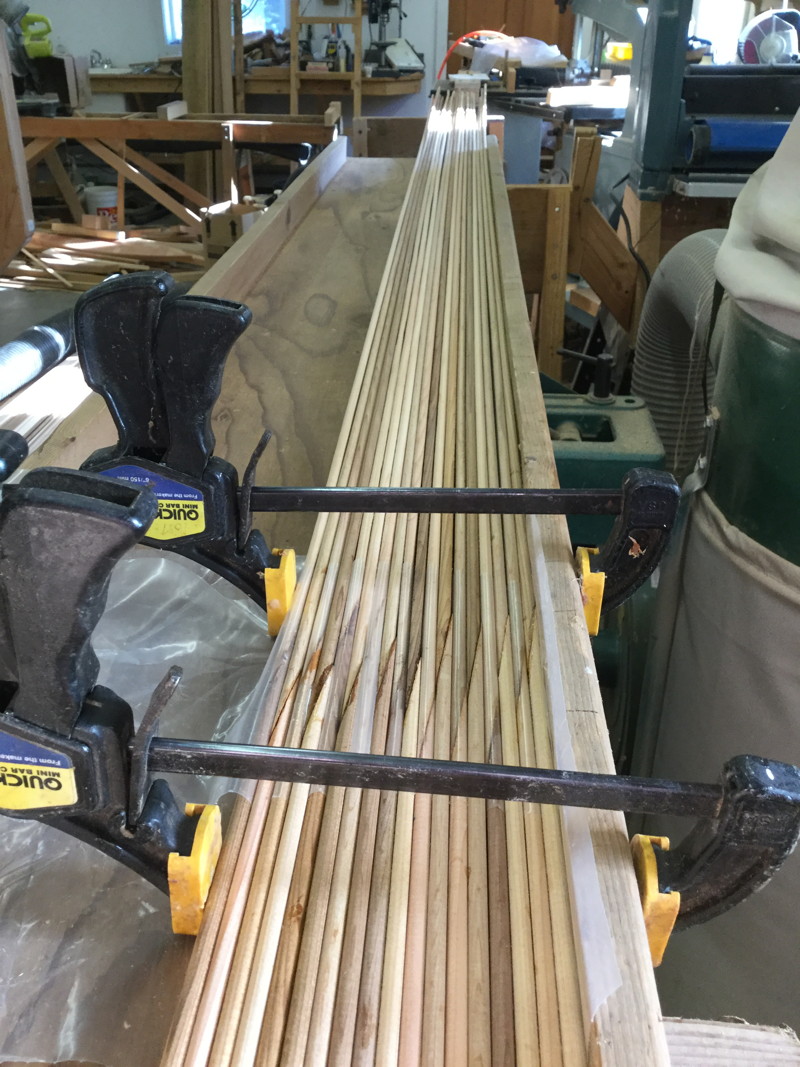
Jan 6th, 2017 - Feather boards attached to the router table and fence not only keep my fingers away from the router bit, but speed up the process and insure better cuts. I have 180 ten foot strips milled, run through the planer and the beads cut. The setup for the coves is complete and the first two planks are done.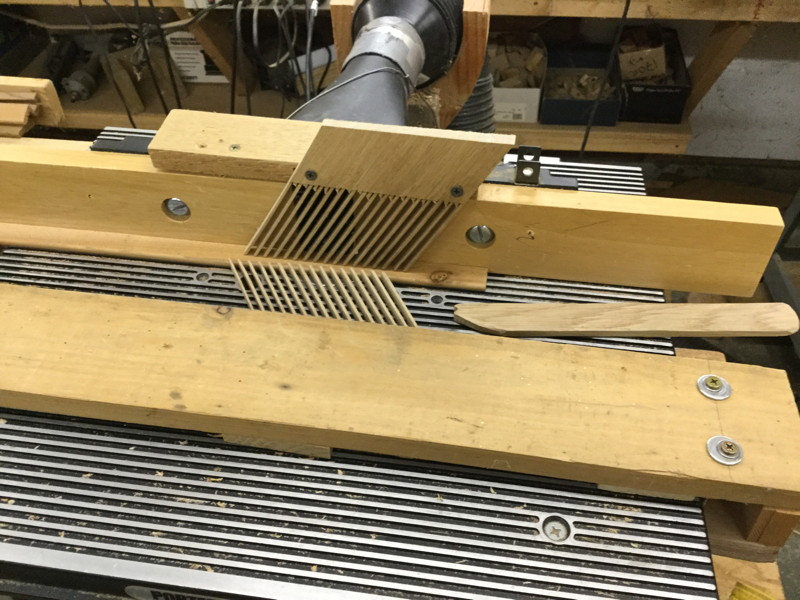
Jan 14th - My plan to butt join the planks didn't work in my first attempts so I'm scarfing the planks now.
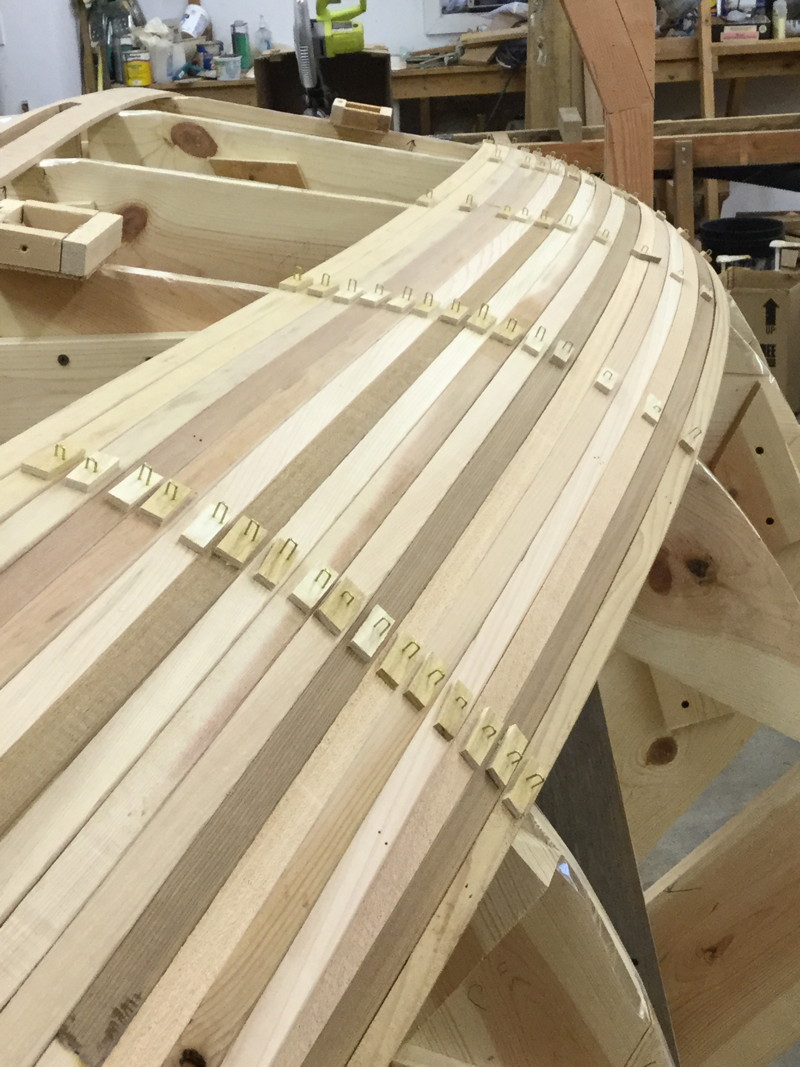
Jan 17th - Cleaned scarfs with surform, block plane and sandpaper followed by a pass over the scarf area in the router to clean up the coves. It sounds like a lot but it went very quickly. The troublesome thing was that the pine molds won't hold the staples like fir does. So, I'm having to use 1 1/4" length, 1/4" crown staples. Since crown staples are designed to bury themselves, I have to reduced depth setting and air pressure. I found that a 1/8" thick ash block works to cushion the planks when removing the staples.
Jan 14th - My plan to butt join the planks didn't work in my first attempts so I'm scarfing the planks now.
Jan 17th - Cleaned scarfs with surform, block plane and sandpaper followed by a pass over the scarf area in the router to clean up the coves. It sounds like a lot but it went very quickly. The troublesome thing was that the pine molds won't hold the staples like fir does. So, I'm having to use 1 1/4" length, 1/4" crown staples. Since crown staples are designed to bury themselves, I have to reduced depth setting and air pressure. I found that a 1/8" thick ash block works to cushion the planks when removing the staples.
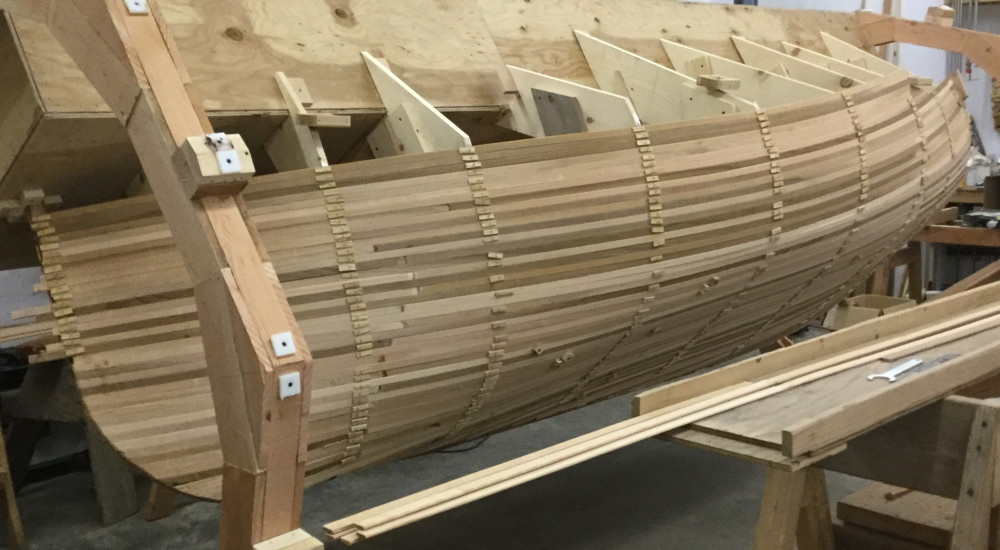
Jan 19th - Epoxied the ends to stem and transom and rolled the hull down about 30 degrees for best new working height.

Jan 20th - Added 18 more planks. It took three 1.5 oz batches of epoxy as even with no heat it sets up after 6 planks. Being able to rotate the hull kept it at a good working height.
Jan 21st - I pulled all the staples from the epoxied ends and trimmed at the stem and keel. I needed four small batches of epoxy to plank up to the keel.
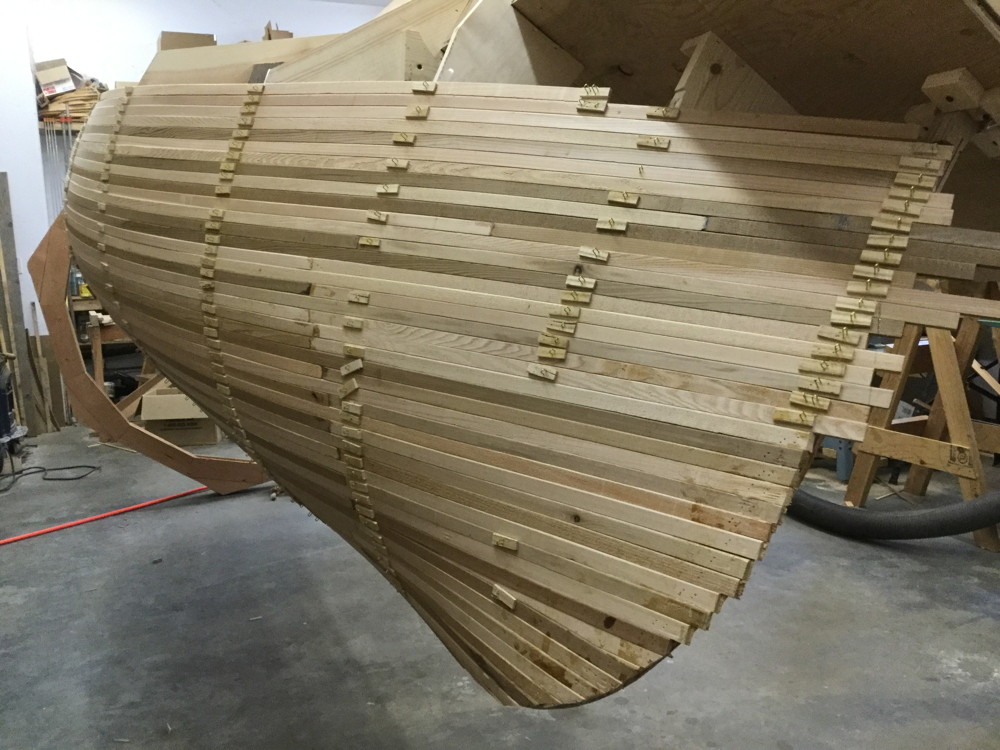
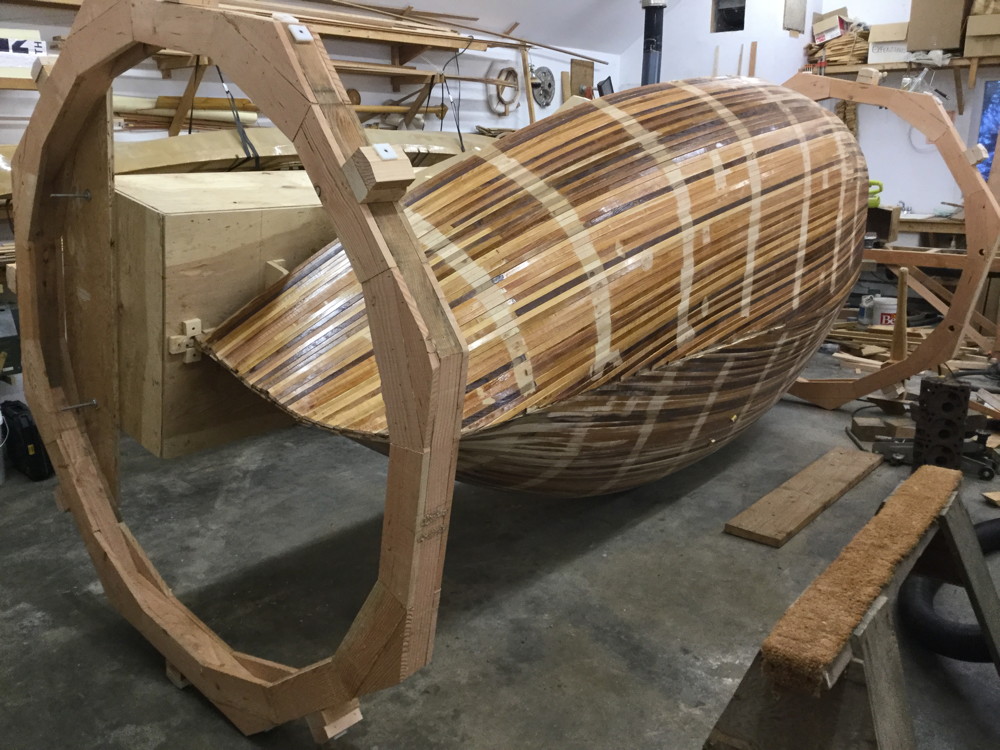
Jan 22-24 - Rolled the hull to working height and finished the first side up to the sheer.
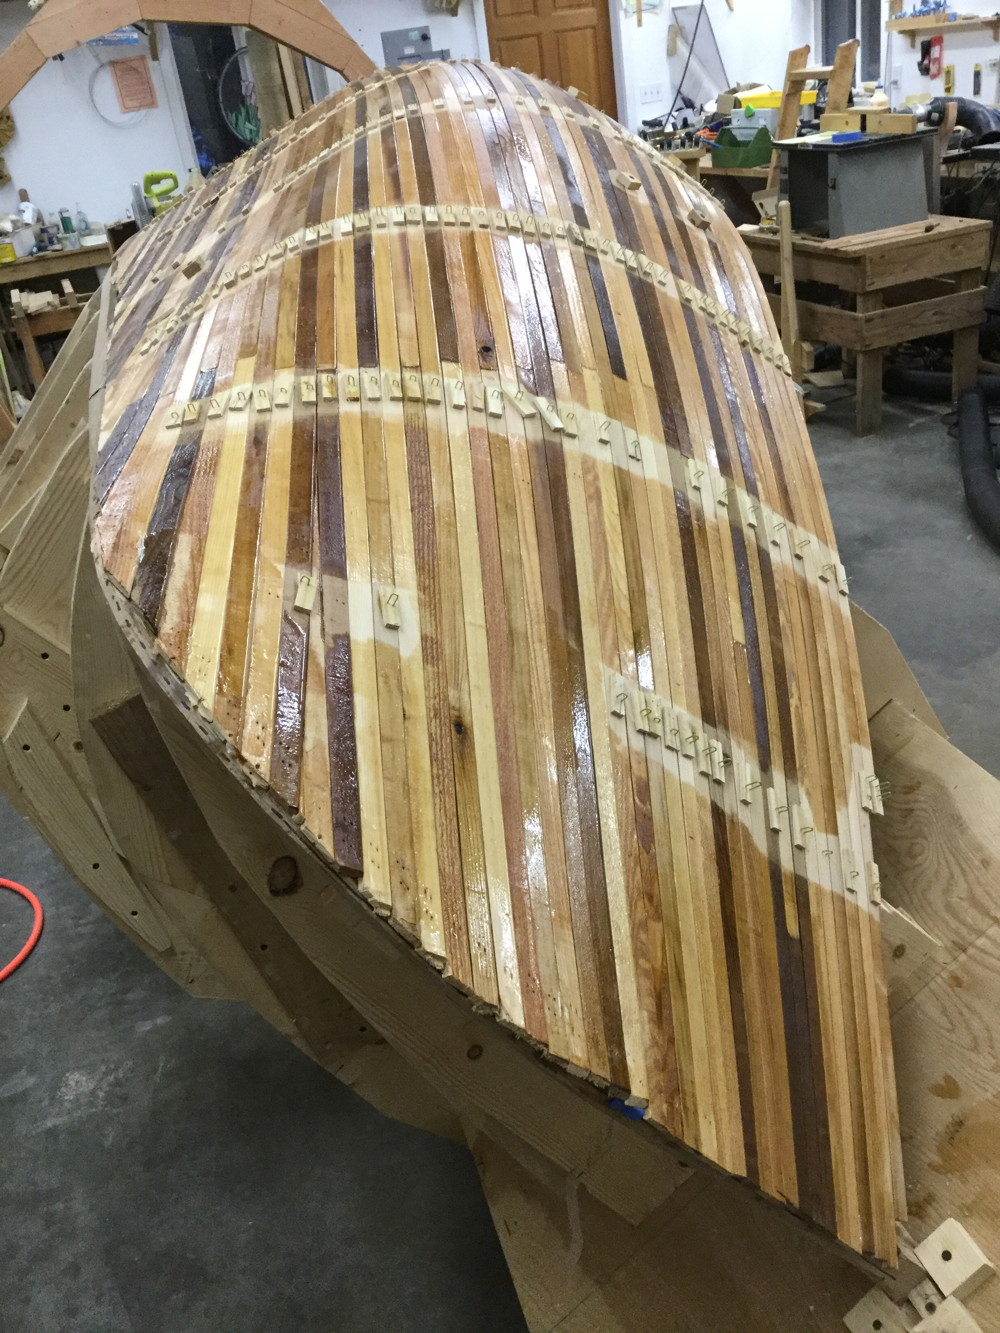
Jan 26th - Clear Coated the first side. Hopefully I'll be able to pull a few hundred of those blocks off to use on the other side. Using Clear Coat to hold the planks together for fairing and glassing worked on my tender and my kayak, but there's no guarantee it will work on a hull this size. I don't have a plan "B" at this point, so hope I don't need one.
Jan 27-29th - The Clear Coat joined the planks together quite well. Scarfed 14 longer planks which will finish the first layer. I found the added weight of the planking and epoxy made turning the wheels difficult in some positions so added a 65 lb weight opposite the box in an attempt to better the balance. That helped but added weight so it was still too hard to turn. Added blocks on flats in the wheels to reduce the span between pivot points by half. That helped considerably.
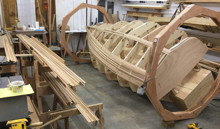
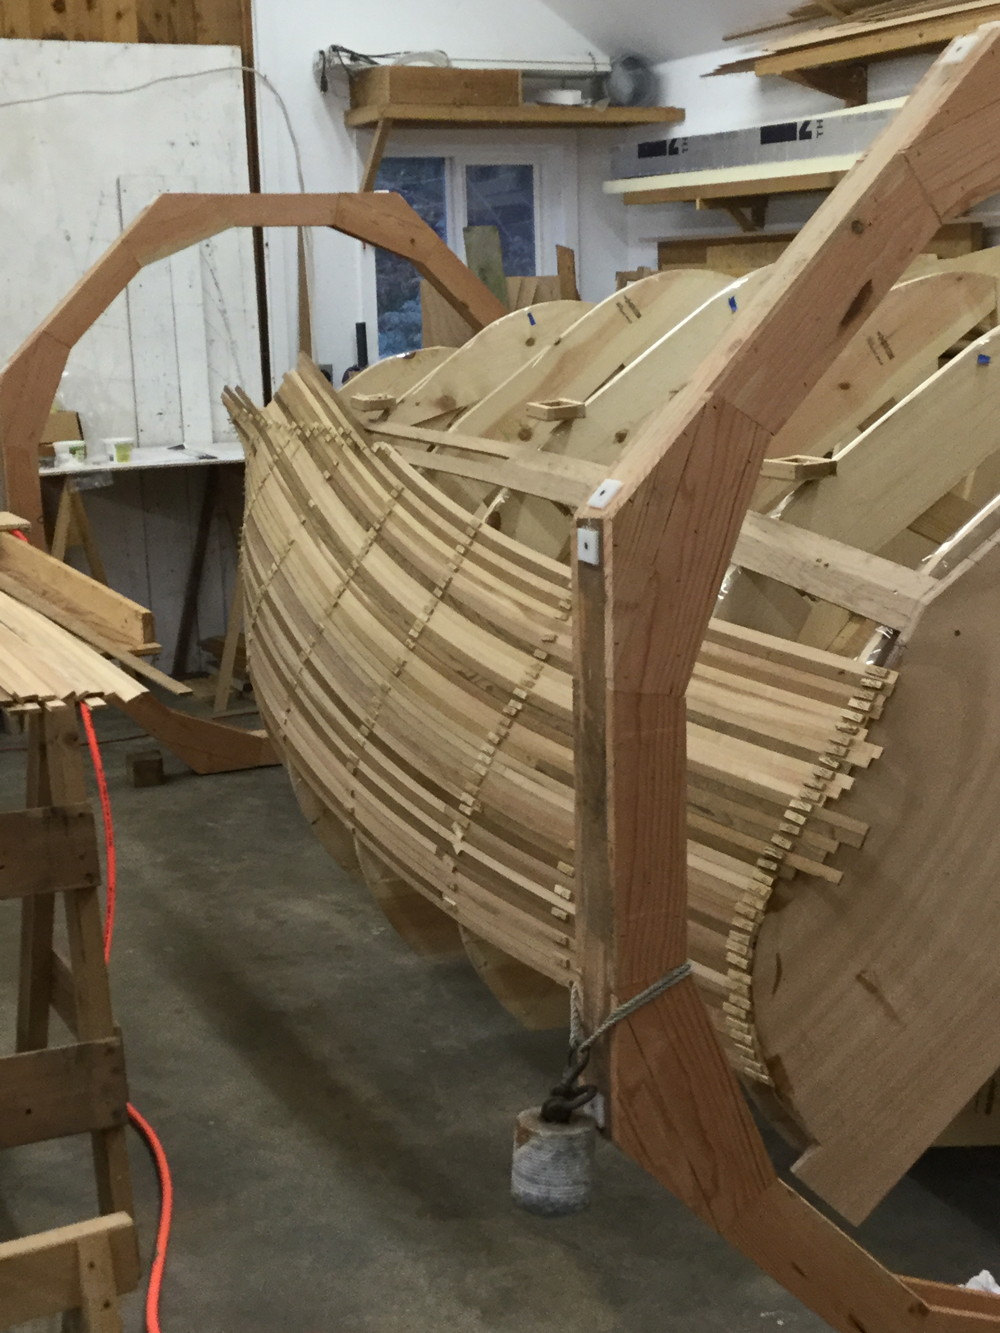
Feb 8th - I finally got the last plank of the first layer on.
Aft view. I'll use ClearCoat to join the planks, then fair with epoxy and microballoons before starting the second layer of 1/4" cedar.
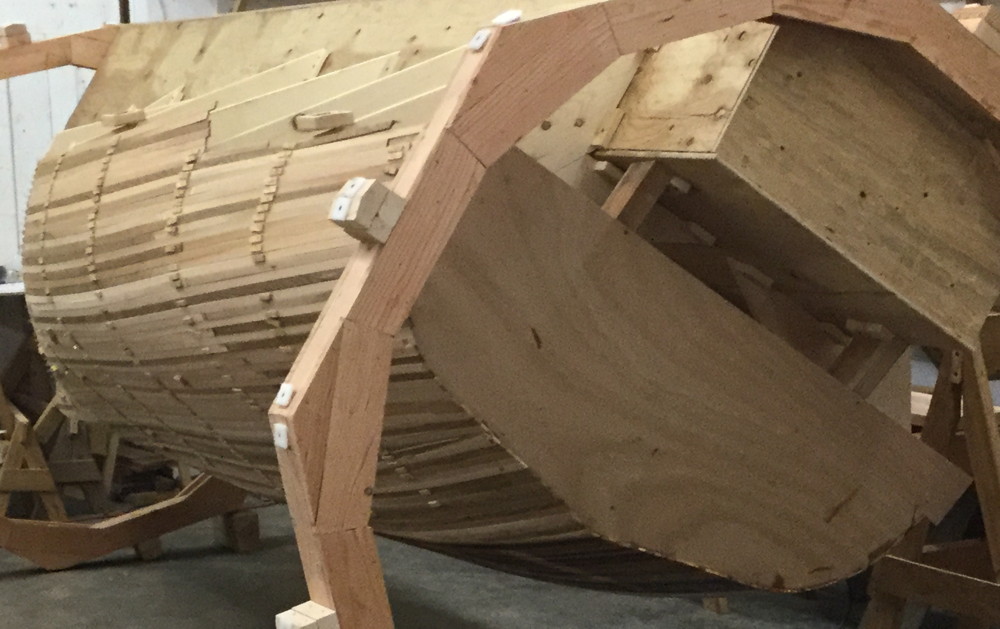
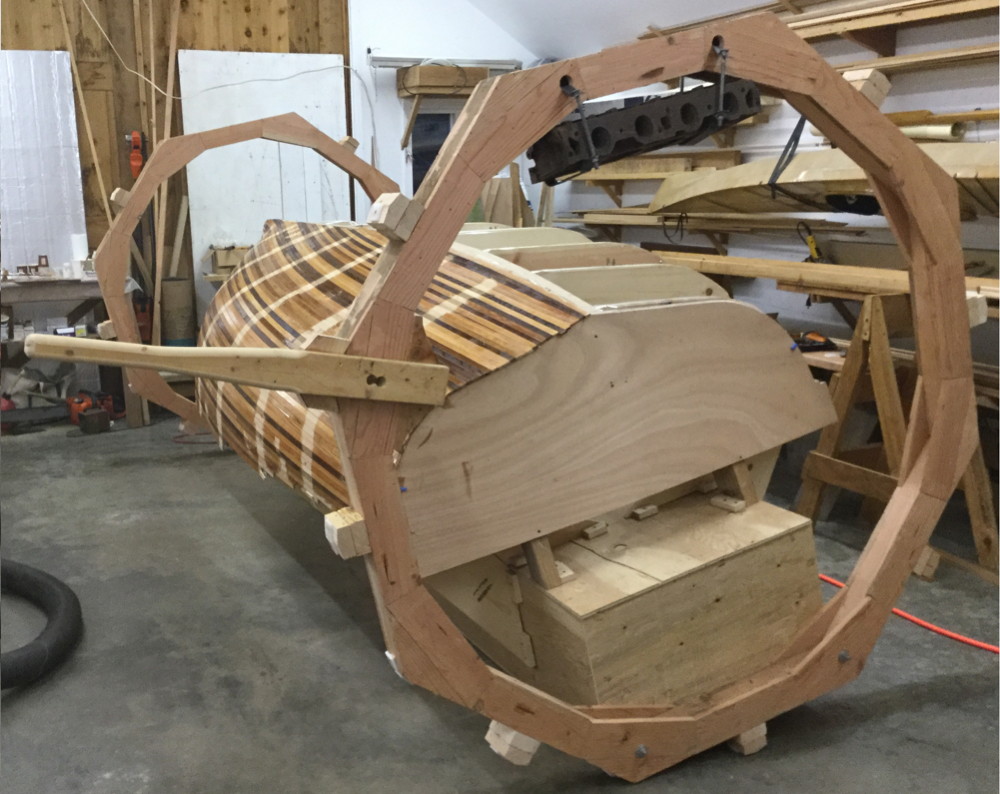
Feb 15th - More wheel modifications. The added weight of planking was still making rolling difficult so I decided to raise the box on the wheels to bring the mass into better balance. That made rolling the hull much easier.
That turned out to be the last I worked on the project, and I turned the project over to a good friend to either sell or finish himself. With our moving to Idaho, that ended my quite enjoyable efforts in building boats.
Jan 20th - Added 18 more planks. It took three 1.5 oz batches of epoxy as even with no heat it sets up after 6 planks. Being able to rotate the hull kept it at a good working height.
Jan 21st - I pulled all the staples from the epoxied ends and trimmed at the stem and keel. I needed four small batches of epoxy to plank up to the keel.
Jan 22-24 - Rolled the hull to working height and finished the first side up to the sheer.
Jan 26th - Clear Coated the first side. Hopefully I'll be able to pull a few hundred of those blocks off to use on the other side. Using Clear Coat to hold the planks together for fairing and glassing worked on my tender and my kayak, but there's no guarantee it will work on a hull this size. I don't have a plan "B" at this point, so hope I don't need one.
Jan 27-29th - The Clear Coat joined the planks together quite well. Scarfed 14 longer planks which will finish the first layer. I found the added weight of the planking and epoxy made turning the wheels difficult in some positions so added a 65 lb weight opposite the box in an attempt to better the balance. That helped but added weight so it was still too hard to turn. Added blocks on flats in the wheels to reduce the span between pivot points by half. That helped considerably.
Feb 8th - I finally got the last plank of the first layer on.
Aft view. I'll use ClearCoat to join the planks, then fair with epoxy and microballoons before starting the second layer of 1/4" cedar.
Feb 15th - More wheel modifications. The added weight of planking was still making rolling difficult so I decided to raise the box on the wheels to bring the mass into better balance. That made rolling the hull much easier.
That turned out to be the last I worked on the project, and I turned the project over to a good friend to either sell or finish himself. With our moving to Idaho, that ended my quite enjoyable efforts in building boats.