The Design
William Garden's book The Making of Tom Cat. tells the story of how he came to design this boat and provides more than a good preview of the plans, it's also a guide to the construction. The book explains the similarities the design has with the Beetle Cat design. Although not mentioned in the book, except for the hull length the design is more like the Beetle 14 with seats in the cockpit and the higher freeboard.
Photos of Bill Garden sailing Tom Cat from his book:

This is the Wooden Boat Store's link to photos of a cold moulded version of Tom Cat's hull being built. The hull is shown laid up over ribbands with no ribs. (All in 5 days if I'm reading it right.)
There is an extensive WoodenBoat forum thread with dozens of construction photos showing a beautiful strip built version of the hull. This builder chose to add ribs after hull construction. He provides a link to an Australian forum which walks through the steps in building the design.
This is a link to the Beetle Cat 14 page. Scrolling down to the building photos, They install ribs inside the ribbands. In both these Beetle hulls, planking is attached to the ribs as the hull is formed.
Photos of Bill Garden sailing Tom Cat from his book:
This is the Wooden Boat Store's link to photos of a cold moulded version of Tom Cat's hull being built. The hull is shown laid up over ribbands with no ribs. (All in 5 days if I'm reading it right.)
There is an extensive WoodenBoat forum thread with dozens of construction photos showing a beautiful strip built version of the hull. This builder chose to add ribs after hull construction. He provides a link to an Australian forum which walks through the steps in building the design.
This is a link to the Beetle Cat 14 page. Scrolling down to the building photos, They install ribs inside the ribbands. In both these Beetle hulls, planking is attached to the ribs as the hull is formed.
---------- Building Decisions ----------
(Putting my thinking into writing helps me make better decisions sometimes, so this section is mostly for my benefit.)
August 2015 - Garden's drawings show carvel planking on ribs covered with a layer of epoxy and fiberglass with the option of strip planking over ribs. His method forms the ribs outside the ribbands, which match with the construction photos of the Beetle Cat on their web page. I'm drawn however to the Beetle 14 method which places the ribs inside the ribbands. Having steam bent ribs this way before I found it was much easier and took many fewer clamps and hands. Except in the mid section, the ribs need to twist or be planed for the planks to lie flat on them. My guess at this point is that to bend bevels into the ribs many will need to be laminated from 3/8" or 1/4" thickness strips in order to lie flat. The other challenge will be bending 7 1/2 foot ribs all by myself. I plan to construct the mold structure to allow access to the inner area of the hull area to accommodate the bending and laminating. This Beetle Cat 14 photo illustrates the relationship of the ribs to the ribbands and planking.
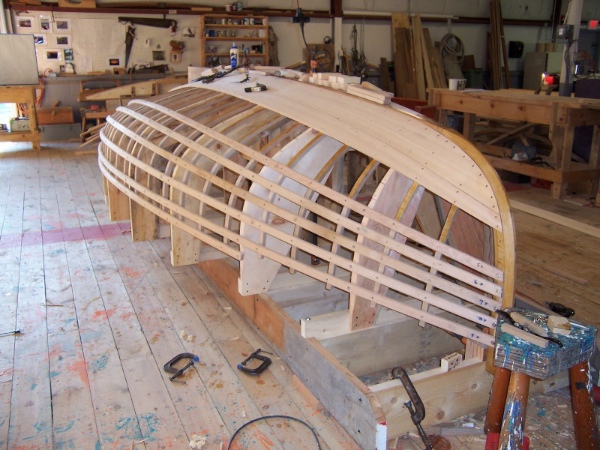
This photo was taken previosly with the same molds rotated upside down for rib bending and placement.
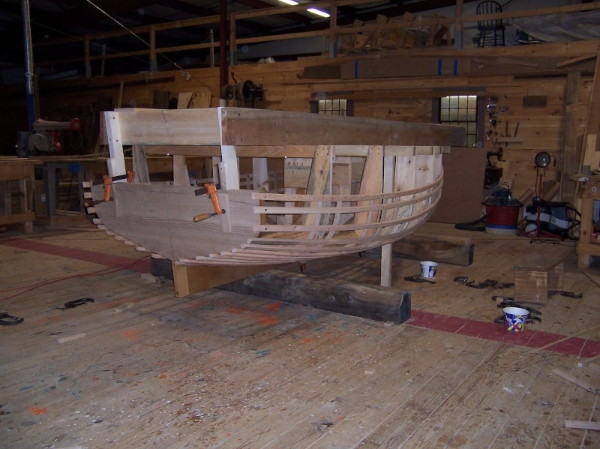
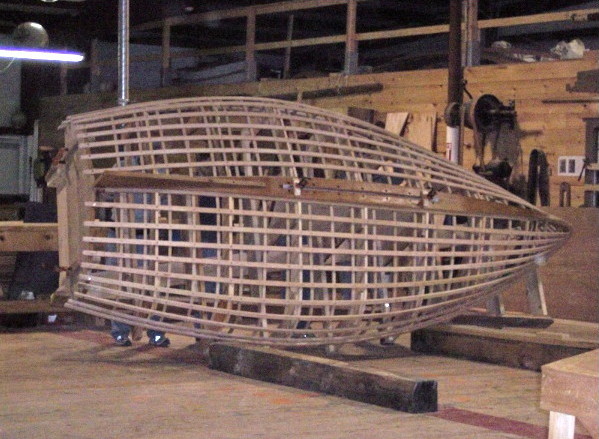
Construction photos show the mold frame rotated in other positions during the hull forming process.
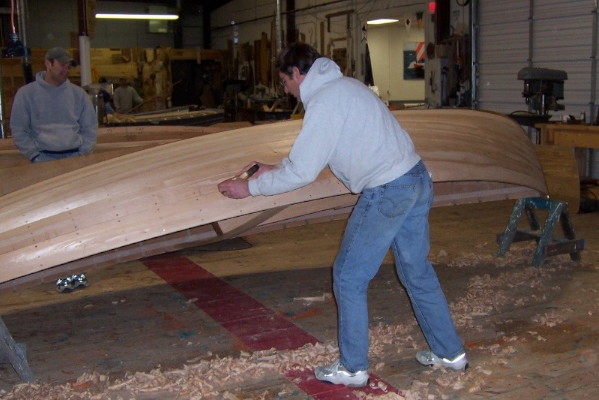
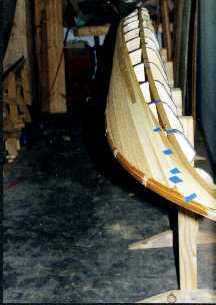
In strip building my 17 foot kayak, I fabricated a square box beam for a stongback to mount all my molds. The molds were free rotating and it worked perfectly when planking the sides where I could hold them as shown below. This kayak was in the water 30 days after laying the first plank and the only fairing needed was done with a palm sander.
The above photos inspired me to construct octagonal wheels on the ends of my building platform to allow me to rotate the hull/mold frame without the need for hoists or additional helpers and to provide a stable base in any of 8 positions. The added benefit for me with this process is my being able to work at a height that my aging back can be happy with much longer.
Relative to ribs, the two options I've seen in other builders use with this design is to either strip build directly over the molds (adding additional molds) and skipping the ribbands, or to cold mold the hull. In either case the ribs can be placed inside the hull much the same as with the Beetle 14 and possibly more easily using the hull as the form.
Oct 9th - The plans call for using only five molds, forming the ribs over ribbands, the apron over the ribs and finally the planking over the ribs. All the molds are lofted.
Oct 10th - Tested bent kiln dried wood to radius of sharpest rib bend. Laminating without steaming would require 1/16" thickness. For me, that meant using bending oak and a steam tube to make the ribs. Will need to steam and laminate some ribs in 2 or 3 layers or remove to cut bevels for the planks.
Another decision I came to early on is to plank the hull with two layers of 1/4" bead and cove cedar rather than a single layer of 1/2" cedar. After reading of experienced builders taking a day per strip laying down the thicker strips I recalled the ease I had in working with 1/4" bead and cove strips, where I planked a 17 foot kayak in a single day. It required minimal planing and no fairing compound. The bigger reason for the two layers is that even though the planking is hard enough on the existing lines, I decided to hold to a 12 degree deadrise though the mid section. Ever since my first plywood boat, which had a 12 degree deadrise on all the middle bottom sections, I have been sold on that concept for lightweight sailing craft. That boat would plane down wind in anything over ten knots. One of the first things I noticed when lofting out Gardens lines were that he ignored the concept, yet Fenwick Williams stuck to it even on his larger catboat by putting more rocker in the keels. The key with Garden's design is that he wanted a straight keel profile so that it could be more easily beached and to do that you have to make a compromise somewhere. Since the gunwales have a classy looking rocker but the keel none, he flattened out the deadrise angle in the middle. I couldn't bring myself to do that so I stuck with both his gunwale and keel profiles and kept it anyway, which produces a much sharper bilge radius at station 3. With the design planking, or even cold molded, this would be difficult, but with my two layers of 1/4" planking it should present no problem. My unknown however, is whether I will realize the benefits of the deadrise without any rocker in the keel.
December 9th, 2015 - With the molds in place and the wheel system and box issues behind me, I can now focus all my thinking on how best to proceed from here. My first concern was after I tried to bend a ribband over the sharpened bilge at frame #3. The angle is too sharp for that thickness of ribband which made me reconsider my preference for the extended 12 degree deadrise described above. But my judgement that it's a good tradeoff still prevails.
October 6th, 2016 - After a whole year of consideration of the alternate ways I could form the ribs, the difficulty of doing it myself and my experience with the strength and stiffness of epoxy strip built cedar planking, I decided to not use either ribbands or ribs.
November 10th, 2016 - As I worked on beveling the stem, keel and transom for the planking, I was thinking ahead about epoxiing the strips to the bevels. I've always used staples for the strips but never into hard oak. I envisioned staples either bending or not seating into the oak or sticking and breaking in removing them after the epoxy cured. I made up a test using my electric staple gun fitted with "tile" staples (about 9/16 inch length) and tested dry. I topped the strips with 0.060" thick plastic strips, which keeps the staples from crushing the strips and protects them when pulling out the staples. Some of the staple legs buckled but only when the staple gun was not tight on the strip, and all of them pulled out clean with no breakage.
January 14th, 2016 - I milled the 1/4" bead and cove cedar strips. Butt joining the planks with this much twist and bend doesn't work and the T50 staples don't hold in the soft pine moleds. I decided I need to scarf the planks before attaching and use the pneumatic stapler with at least 7/8" staples. Tests in pine is still prove tricky, but the scarfing seems to be working.
Jan 17th - Settled on using 1 1/4" crown staples (1/4" wids, 18 ga.) 1/8" thick ash cushion strips help in removing ths staples without crushing the soft cedar planks. It seems to work okay with pine or oak without having to switch anything.
August 2015 - Garden's drawings show carvel planking on ribs covered with a layer of epoxy and fiberglass with the option of strip planking over ribs. His method forms the ribs outside the ribbands, which match with the construction photos of the Beetle Cat on their web page. I'm drawn however to the Beetle 14 method which places the ribs inside the ribbands. Having steam bent ribs this way before I found it was much easier and took many fewer clamps and hands. Except in the mid section, the ribs need to twist or be planed for the planks to lie flat on them. My guess at this point is that to bend bevels into the ribs many will need to be laminated from 3/8" or 1/4" thickness strips in order to lie flat. The other challenge will be bending 7 1/2 foot ribs all by myself. I plan to construct the mold structure to allow access to the inner area of the hull area to accommodate the bending and laminating. This Beetle Cat 14 photo illustrates the relationship of the ribs to the ribbands and planking.
This photo was taken previosly with the same molds rotated upside down for rib bending and placement.
Construction photos show the mold frame rotated in other positions during the hull forming process.
In strip building my 17 foot kayak, I fabricated a square box beam for a stongback to mount all my molds. The molds were free rotating and it worked perfectly when planking the sides where I could hold them as shown below. This kayak was in the water 30 days after laying the first plank and the only fairing needed was done with a palm sander.
The above photos inspired me to construct octagonal wheels on the ends of my building platform to allow me to rotate the hull/mold frame without the need for hoists or additional helpers and to provide a stable base in any of 8 positions. The added benefit for me with this process is my being able to work at a height that my aging back can be happy with much longer.
Relative to ribs, the two options I've seen in other builders use with this design is to either strip build directly over the molds (adding additional molds) and skipping the ribbands, or to cold mold the hull. In either case the ribs can be placed inside the hull much the same as with the Beetle 14 and possibly more easily using the hull as the form.
Oct 9th - The plans call for using only five molds, forming the ribs over ribbands, the apron over the ribs and finally the planking over the ribs. All the molds are lofted.
Oct 10th - Tested bent kiln dried wood to radius of sharpest rib bend. Laminating without steaming would require 1/16" thickness. For me, that meant using bending oak and a steam tube to make the ribs. Will need to steam and laminate some ribs in 2 or 3 layers or remove to cut bevels for the planks.
Another decision I came to early on is to plank the hull with two layers of 1/4" bead and cove cedar rather than a single layer of 1/2" cedar. After reading of experienced builders taking a day per strip laying down the thicker strips I recalled the ease I had in working with 1/4" bead and cove strips, where I planked a 17 foot kayak in a single day. It required minimal planing and no fairing compound. The bigger reason for the two layers is that even though the planking is hard enough on the existing lines, I decided to hold to a 12 degree deadrise though the mid section. Ever since my first plywood boat, which had a 12 degree deadrise on all the middle bottom sections, I have been sold on that concept for lightweight sailing craft. That boat would plane down wind in anything over ten knots. One of the first things I noticed when lofting out Gardens lines were that he ignored the concept, yet Fenwick Williams stuck to it even on his larger catboat by putting more rocker in the keels. The key with Garden's design is that he wanted a straight keel profile so that it could be more easily beached and to do that you have to make a compromise somewhere. Since the gunwales have a classy looking rocker but the keel none, he flattened out the deadrise angle in the middle. I couldn't bring myself to do that so I stuck with both his gunwale and keel profiles and kept it anyway, which produces a much sharper bilge radius at station 3. With the design planking, or even cold molded, this would be difficult, but with my two layers of 1/4" planking it should present no problem. My unknown however, is whether I will realize the benefits of the deadrise without any rocker in the keel.
December 9th, 2015 - With the molds in place and the wheel system and box issues behind me, I can now focus all my thinking on how best to proceed from here. My first concern was after I tried to bend a ribband over the sharpened bilge at frame #3. The angle is too sharp for that thickness of ribband which made me reconsider my preference for the extended 12 degree deadrise described above. But my judgement that it's a good tradeoff still prevails.
October 6th, 2016 - After a whole year of consideration of the alternate ways I could form the ribs, the difficulty of doing it myself and my experience with the strength and stiffness of epoxy strip built cedar planking, I decided to not use either ribbands or ribs.
November 10th, 2016 - As I worked on beveling the stem, keel and transom for the planking, I was thinking ahead about epoxiing the strips to the bevels. I've always used staples for the strips but never into hard oak. I envisioned staples either bending or not seating into the oak or sticking and breaking in removing them after the epoxy cured. I made up a test using my electric staple gun fitted with "tile" staples (about 9/16 inch length) and tested dry. I topped the strips with 0.060" thick plastic strips, which keeps the staples from crushing the strips and protects them when pulling out the staples. Some of the staple legs buckled but only when the staple gun was not tight on the strip, and all of them pulled out clean with no breakage.
January 14th, 2016 - I milled the 1/4" bead and cove cedar strips. Butt joining the planks with this much twist and bend doesn't work and the T50 staples don't hold in the soft pine moleds. I decided I need to scarf the planks before attaching and use the pneumatic stapler with at least 7/8" staples. Tests in pine is still prove tricky, but the scarfing seems to be working.
Jan 17th - Settled on using 1 1/4" crown staples (1/4" wids, 18 ga.) 1/8" thick ash cushion strips help in removing ths staples without crushing the soft cedar planks. It seems to work okay with pine or oak without having to switch anything.
---------- Ribs ----------
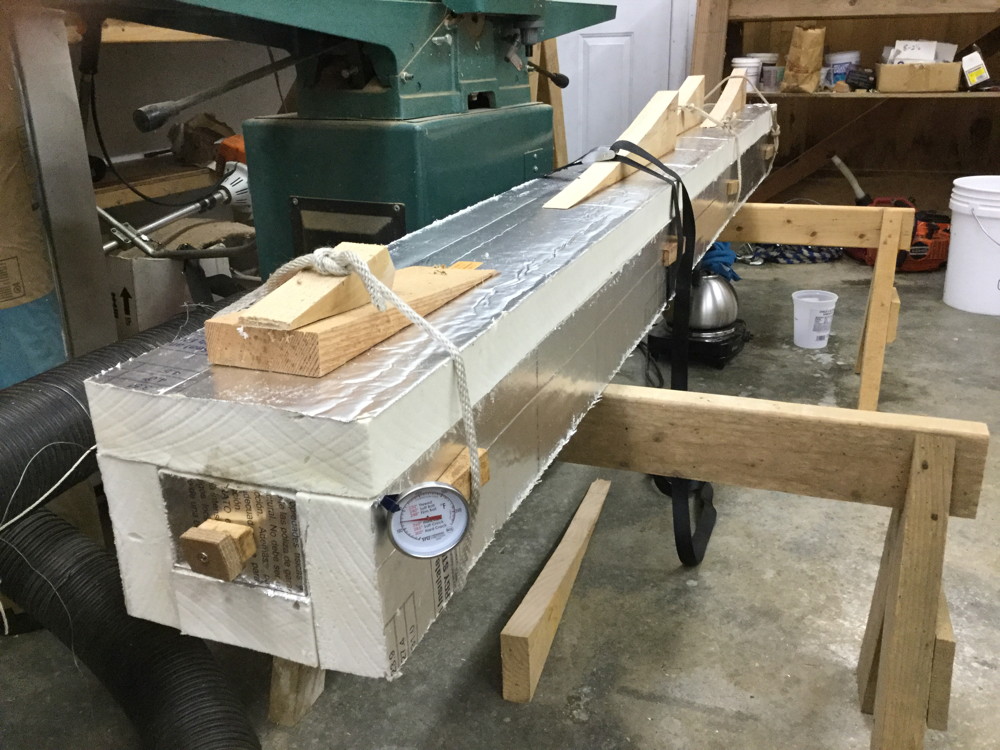
Oct 17th, 2015 - Bought a 900 watt hot plate, kettle and high temp foam, constructed 8 foot steam box and tested bending a 4 foot rib into mockup of internal ribband mold.
Oct 18 - 19th - Tested bending two 3/8" thick ribs together. That was better than trying the full 3/4" thickness but it didn't really work either. I did discover that I could straighten out a rib using my heat gun to fit back in the 4" wide steam box. That worked fine by doing each piece separately. Lofted out the stem and made a mold board for it.
Oct 20th - Based on the results of my simulated rib bending and my experience with bending the ribs for my kayak plus the size of the ribs, I decided to make the molds for the ribs to fit inside the ribbands as is done with the Beetle 14 construction.
So... NO RIBS!!!. But the oven worked great for the stem laminations.
---------- Wheels ----------
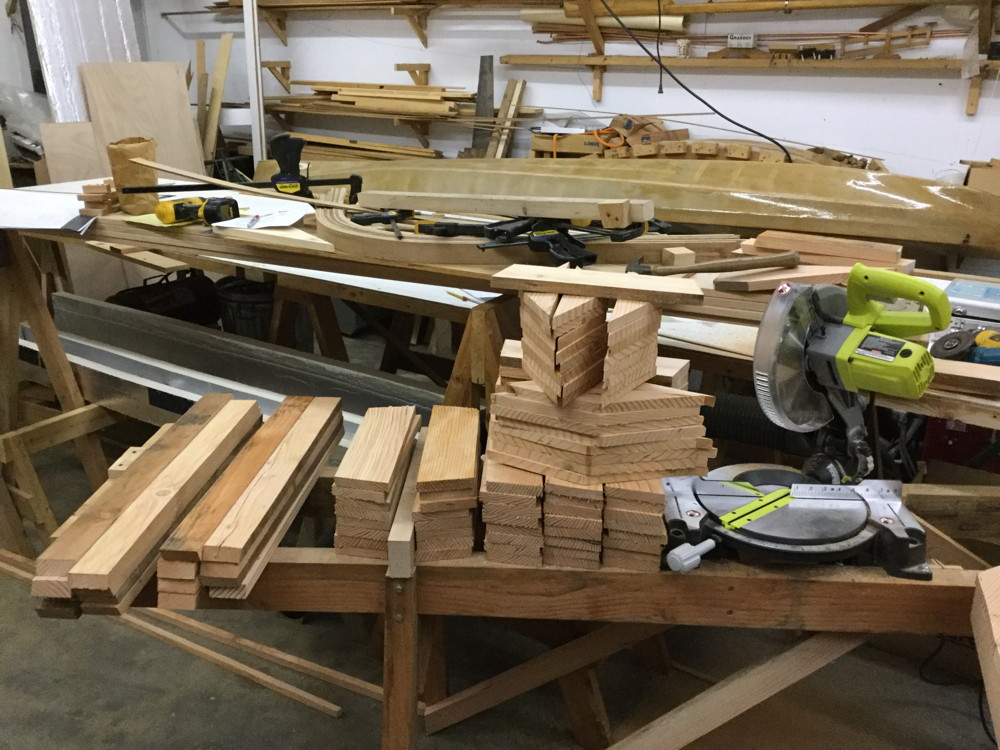
Oct 31st - Nov 1st - I spent these two days first realizing my skil saw and band saw were not up to the job of cutting the 128 angular pieces required in making the wheels. So I bought a miter saw at Home Depot and made a bench for it.
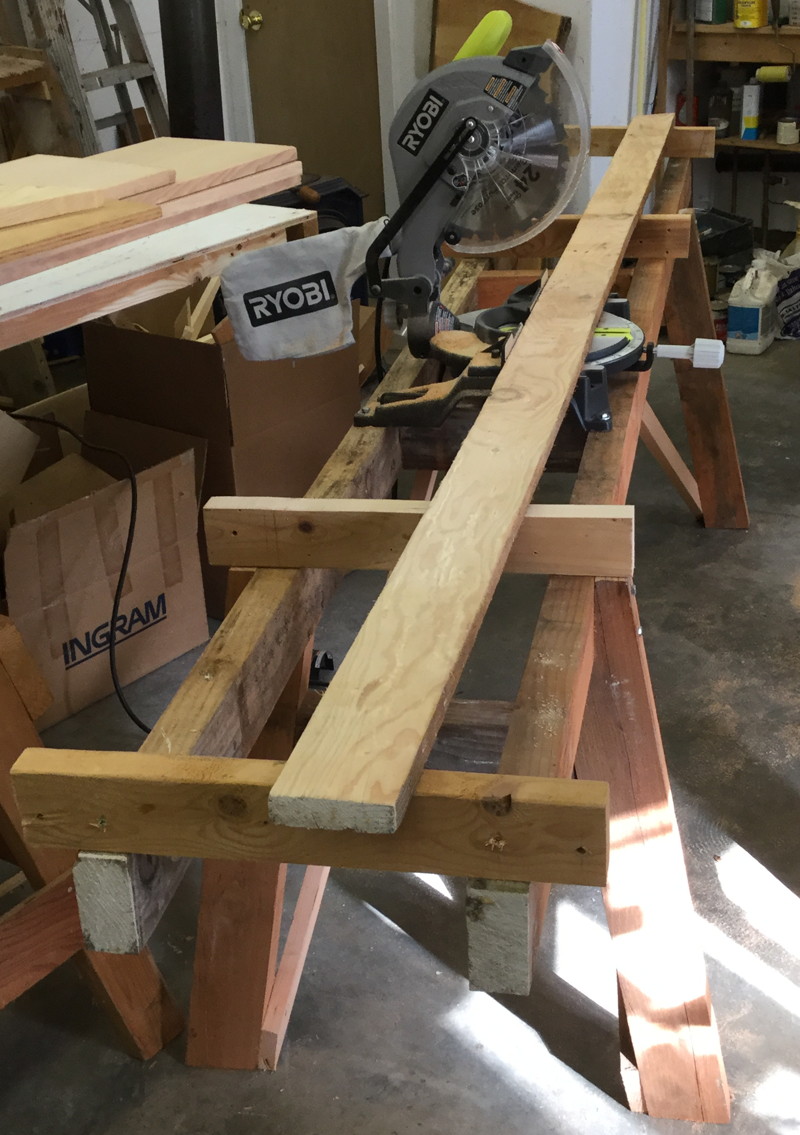
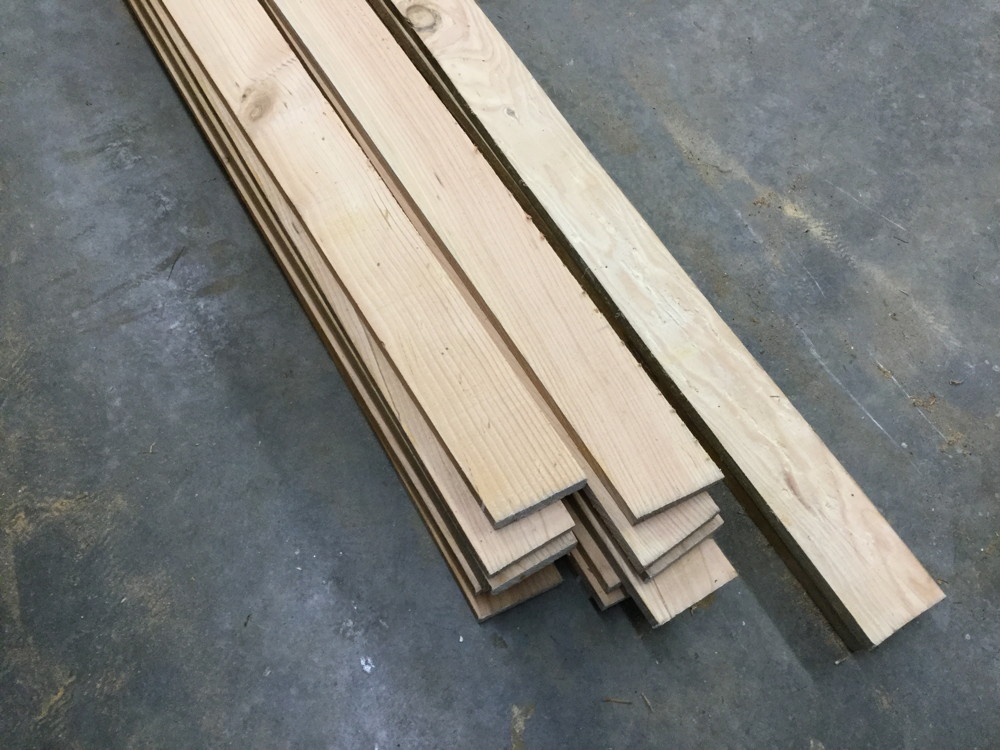
Ripped and milled up planks for the wheel parts.
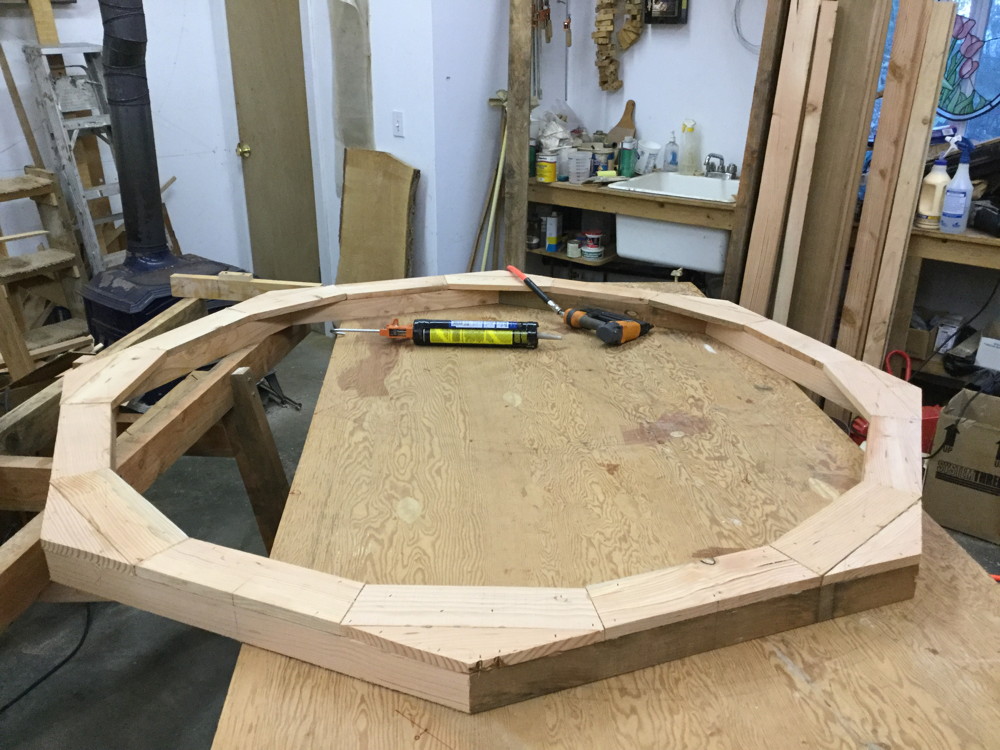
Nov 23-25th Milled up the remaining wheel parts, cut the 32 internal pieces...
...fastened the first corner.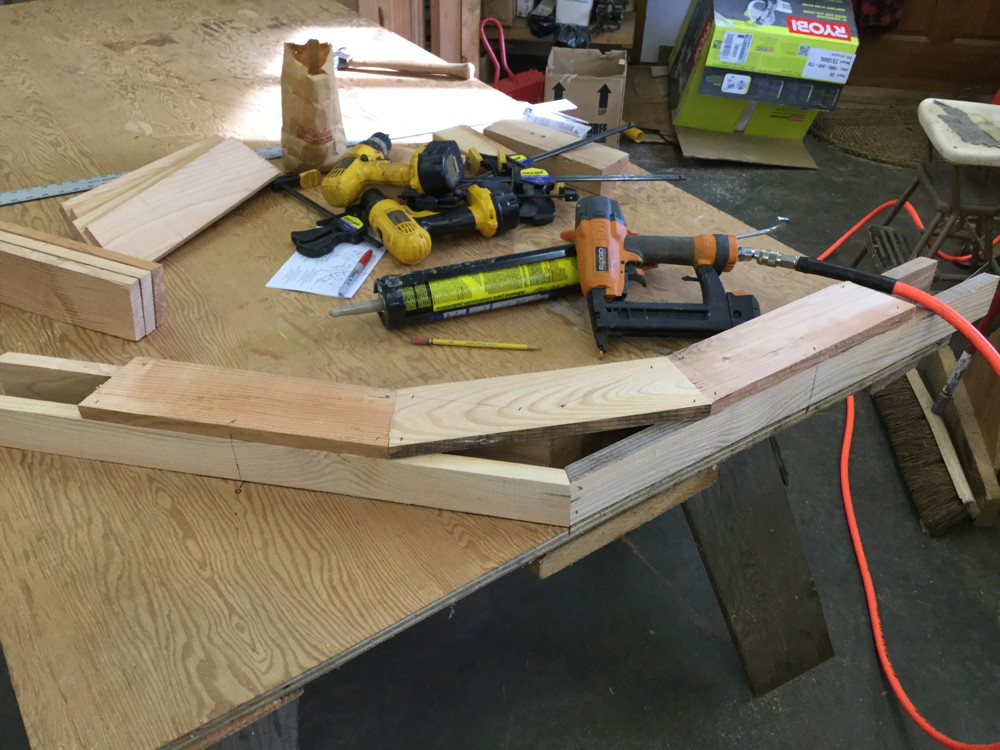
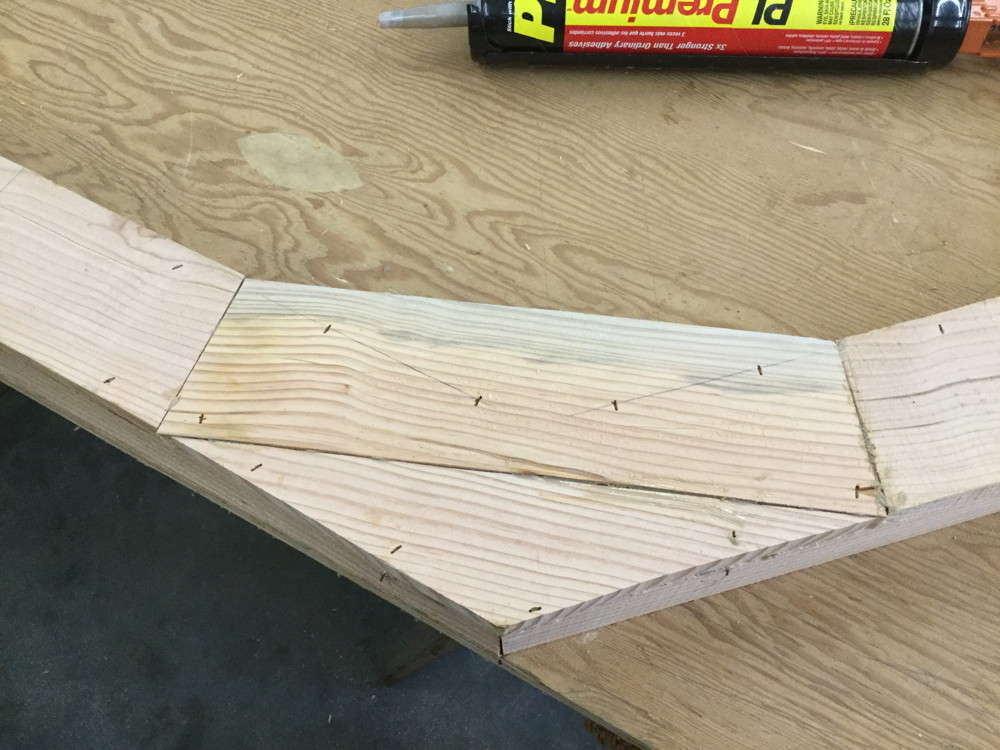
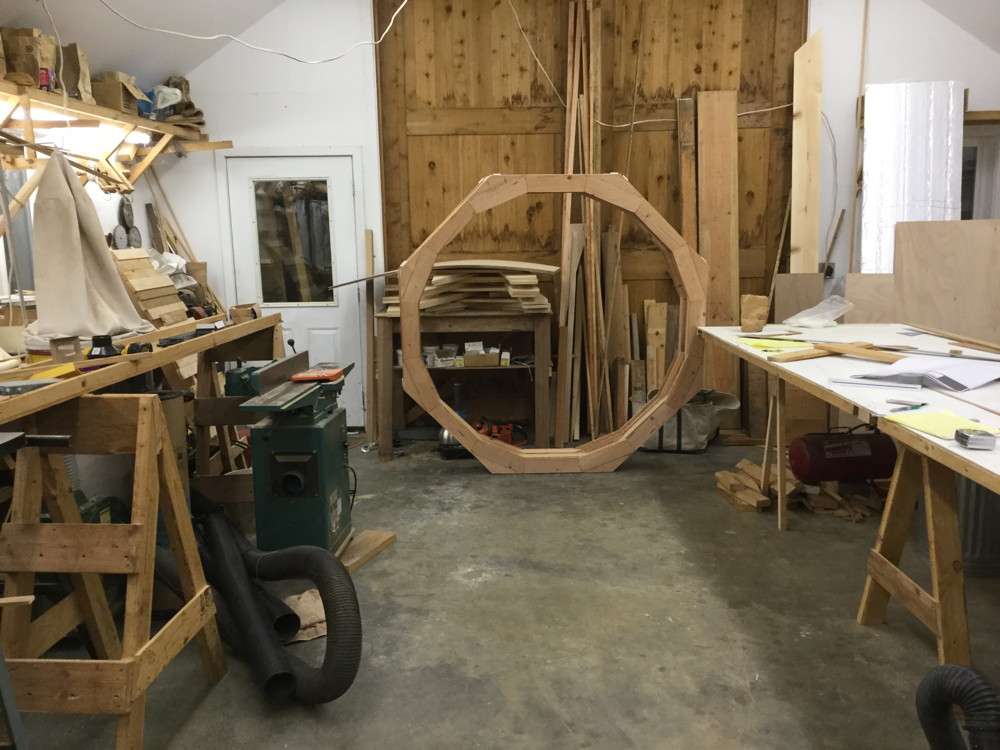
Cut out the 96 face pieces and assembled the face on one side of the first wheel.
Nov 27th - Attached back face to first wheel and trimmed with router. Fabricated HDPE feet for the wheels and attached to the first wheel. Attached first face to second wheel.
Nov 28th - Bought more adhesive and bolts to attach wheels to mold box. Finished second wheel except trimming last side and attaching feet.
Nov 29th - Finished trimming and adding HDPE feet to the second wheel. Completed all the plywood cuts for the box. Rearranged the shop to try to gain enough space for the box/wheels but will have to move the kayak to have enough room to walk around it.
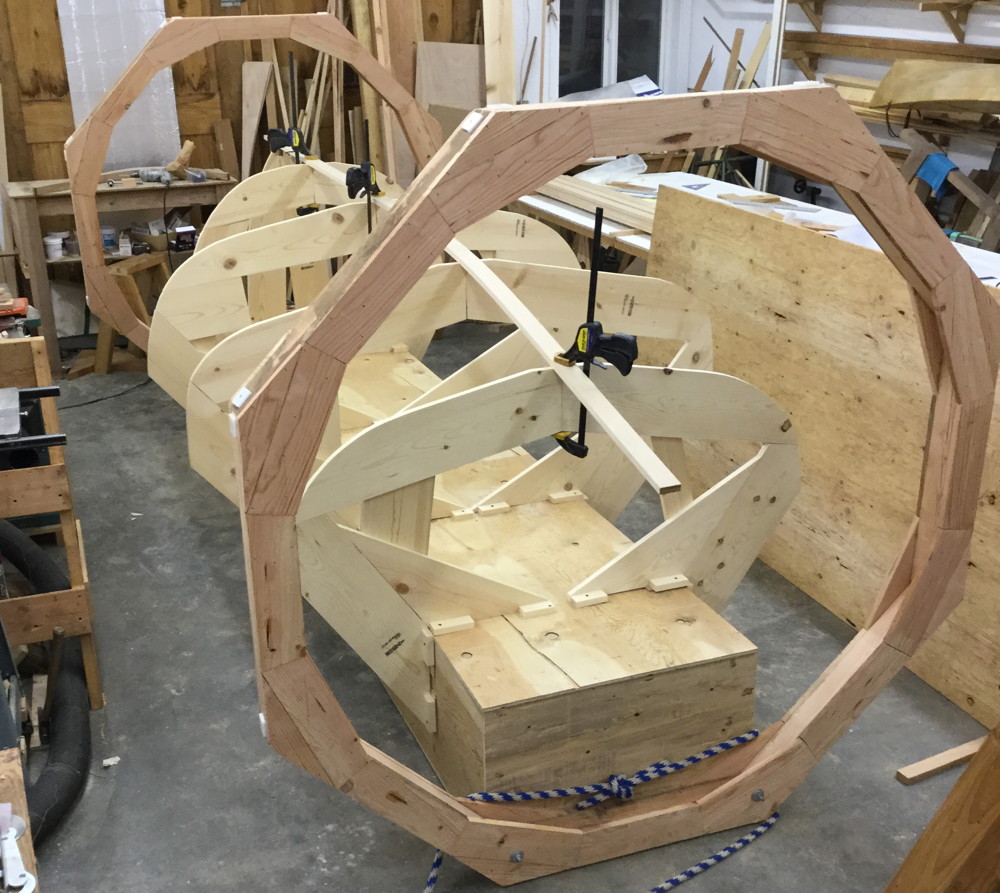
Dec 1st - Assembled ends and side of mold box and bolted one end to one of the wheels with the sides held with screws. All is looking just as I had hoped so far.
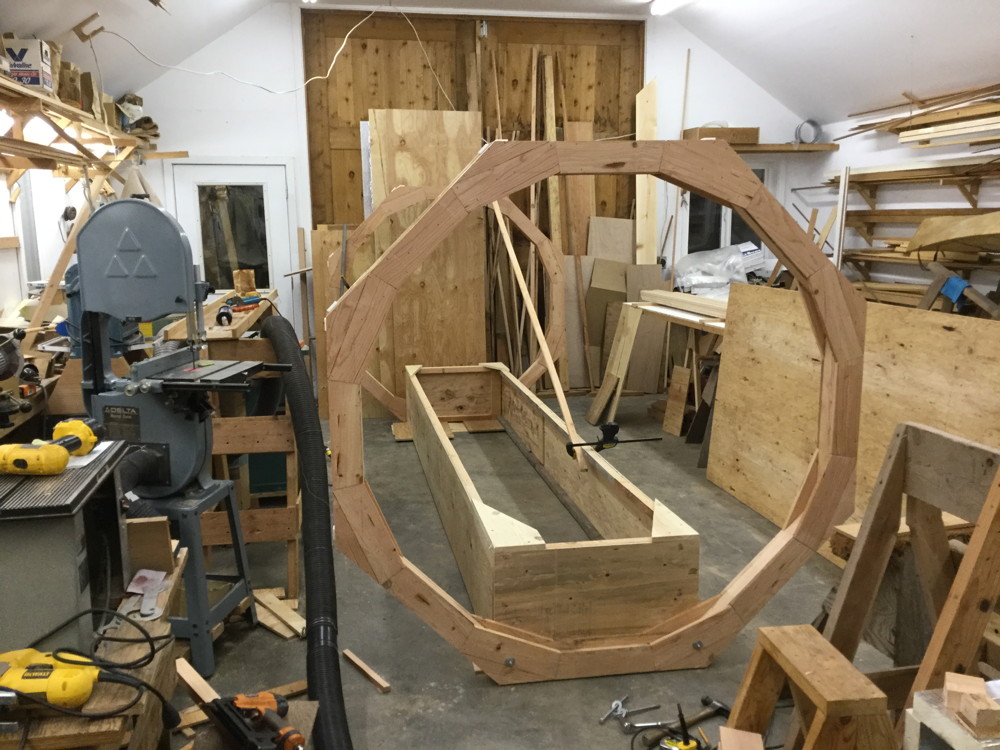
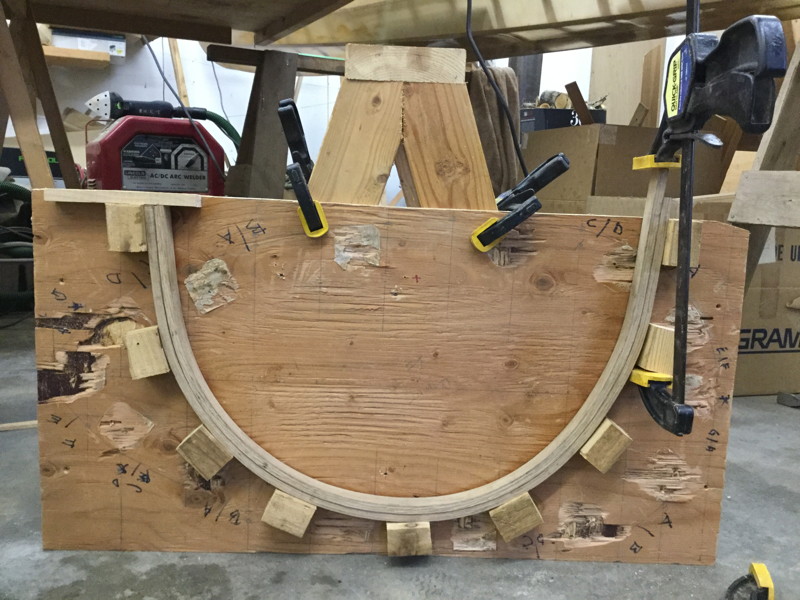
Dec 2nd - I made a trip to the lumber yard for more glue and also bought 5,000 3/4" staples. (the 7/8" staples come through when stapling 1/2" to 1/2" but these don't. Also these are bare galvanized and they hold better I discovered.) Attached ends to sides of mold box and bolted the remaining end. I goofed yesterday and forgot to allow space for the bottom so I had to redo the bolts on that end. The wheels came out perfectly plumb and the box corners square. I laminated the stem after dinner. Since my epoxy metering pumps aren't working, I had to mix the epoxy in 4 separate batches because the balance beam can only manage 6 oz cups. (It takes two 6 oz cups to make one 4 oz batch because I pour back and forth while mixing to insure I get a good mix.) That kept me in the shop until way past my normal bed time.
Dec 4th - I tried to roll the box upside down to add stiffeners and put on the bottom panel. With only the top screwed on the box twists way too much. So, I had to resort to using 2x4 levers to get it to 135 degrees in 1/16th turn increments. The box is positioned to balance with the wheels only when the molds and ribbands or planking are in place. I installed the bottom panel, rotated it back to box at bottom, and installed the bracing and top panel.
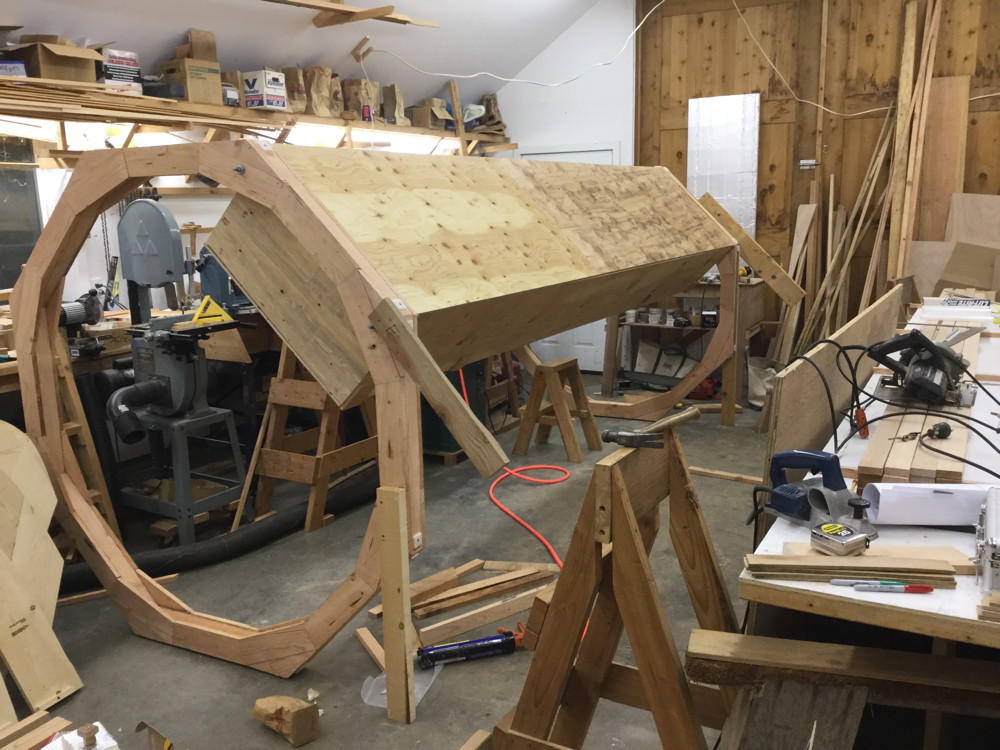
Dec 5th - Installed the molds and sprung a ribband over the center of the molds.
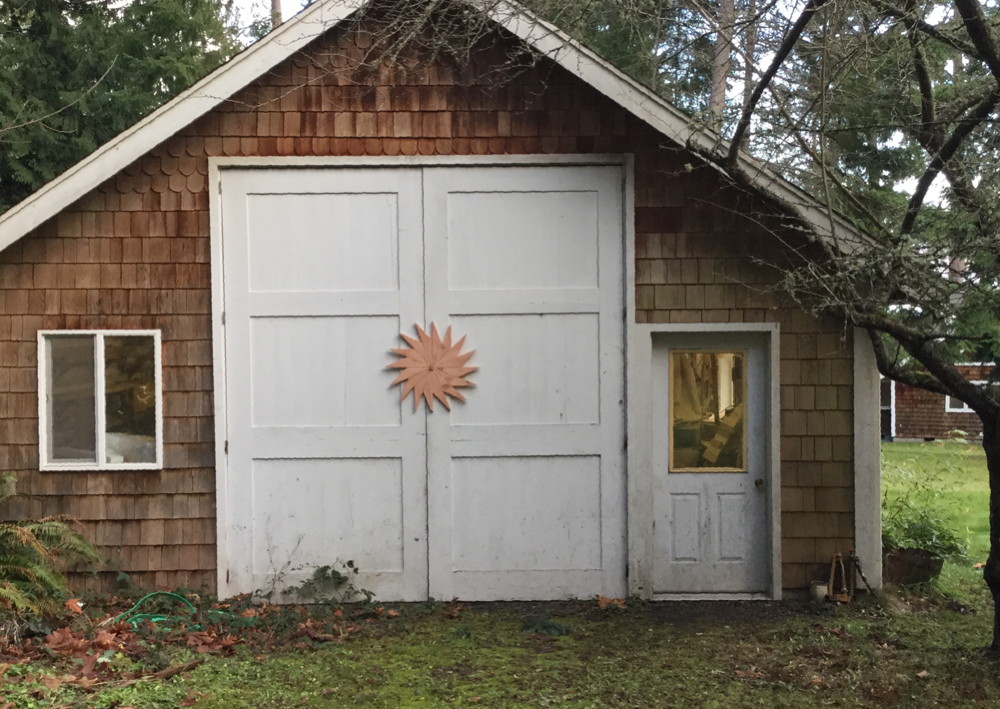
Dec 2015 - I glued the extra pieces I cut for the wheel into a Christmas star and attached to the big shop doors for the holidays.
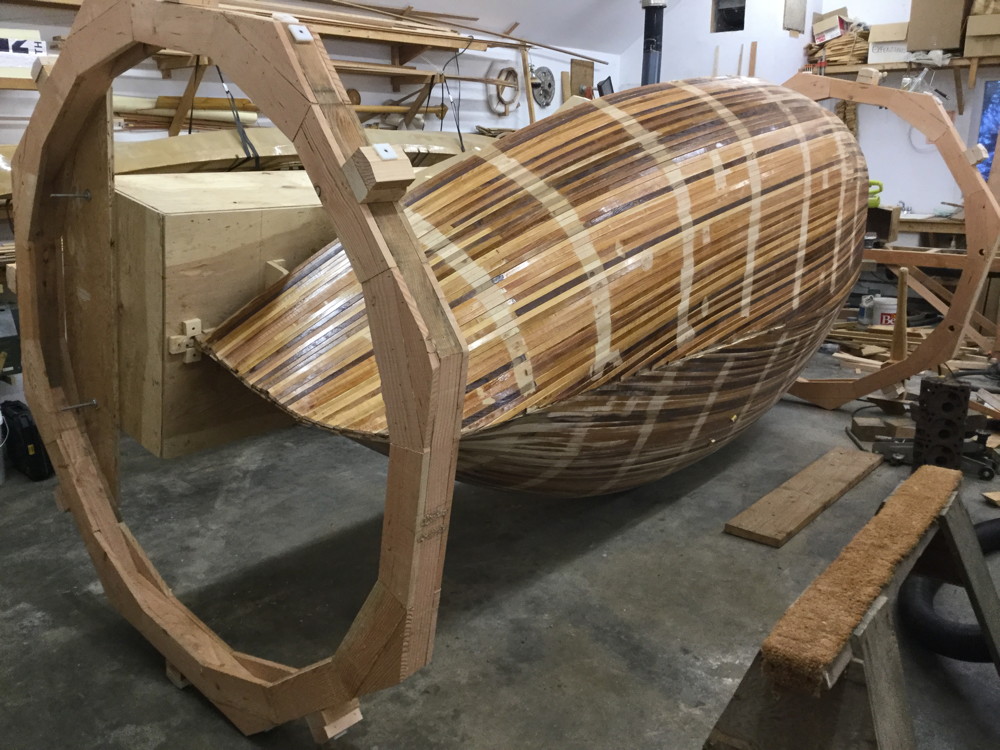
Jan 29th, 2016 - As planking progressed I found that 45 degree turns were too much and the box weight needed to be balanced to keep the wheels more stable. Changed to a 16 point wheel and added a counterweight.
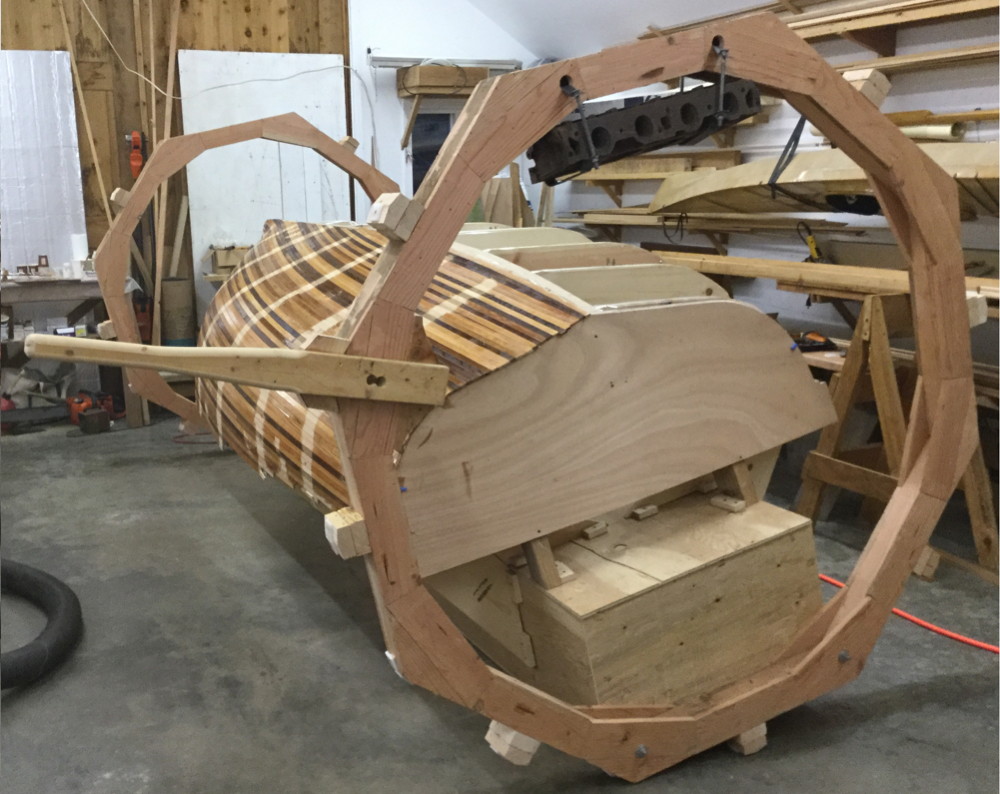
Feb 15th - The added weight of planking was still making rolling difficult so I decided to raise the box on the wheels to bring the mass into better balance. This makes rolling the hull much easier.
...fastened the first corner.
Cut out the 96 face pieces and assembled the face on one side of the first wheel.
Nov 27th - Attached back face to first wheel and trimmed with router. Fabricated HDPE feet for the wheels and attached to the first wheel. Attached first face to second wheel.
Nov 28th - Bought more adhesive and bolts to attach wheels to mold box. Finished second wheel except trimming last side and attaching feet.
Nov 29th - Finished trimming and adding HDPE feet to the second wheel. Completed all the plywood cuts for the box. Rearranged the shop to try to gain enough space for the box/wheels but will have to move the kayak to have enough room to walk around it.
Dec 1st - Assembled ends and side of mold box and bolted one end to one of the wheels with the sides held with screws. All is looking just as I had hoped so far.
Dec 2nd - I made a trip to the lumber yard for more glue and also bought 5,000 3/4" staples. (the 7/8" staples come through when stapling 1/2" to 1/2" but these don't. Also these are bare galvanized and they hold better I discovered.) Attached ends to sides of mold box and bolted the remaining end. I goofed yesterday and forgot to allow space for the bottom so I had to redo the bolts on that end. The wheels came out perfectly plumb and the box corners square. I laminated the stem after dinner. Since my epoxy metering pumps aren't working, I had to mix the epoxy in 4 separate batches because the balance beam can only manage 6 oz cups. (It takes two 6 oz cups to make one 4 oz batch because I pour back and forth while mixing to insure I get a good mix.) That kept me in the shop until way past my normal bed time.
Dec 4th - I tried to roll the box upside down to add stiffeners and put on the bottom panel. With only the top screwed on the box twists way too much. So, I had to resort to using 2x4 levers to get it to 135 degrees in 1/16th turn increments. The box is positioned to balance with the wheels only when the molds and ribbands or planking are in place. I installed the bottom panel, rotated it back to box at bottom, and installed the bracing and top panel.
Dec 5th - Installed the molds and sprung a ribband over the center of the molds.
Dec 2015 - I glued the extra pieces I cut for the wheel into a Christmas star and attached to the big shop doors for the holidays.
Jan 29th, 2016 - As planking progressed I found that 45 degree turns were too much and the box weight needed to be balanced to keep the wheels more stable. Changed to a 16 point wheel and added a counterweight.
Feb 15th - The added weight of planking was still making rolling difficult so I decided to raise the box on the wheels to bring the mass into better balance. This makes rolling the hull much easier.