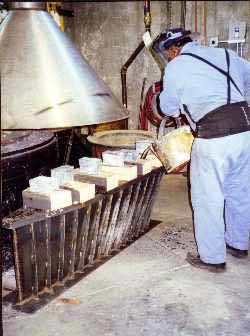
The keel pouring took place in Seattle. I designed and welded the keel mold from 1/8" plate steel which I bought in 4 by 8 foot sheets. The foundry normally pours in molds made from 8" thick concrete or 1/2" thick steel and the forman has the right to reject anything he feels is inadequate. After many questions, Chet, the forman, seemed satisfied however. He took me around the foundry to show me several molds that had failed or had been rejected for various reasons. He was in his 44th year at the foundry.
He apparently had such confidence in my mold that when we returned two days later for the pour, he had placed it across a 24" wide utility trench. I was quite nervous over this and had visions of the seams splitting while it was full of molten lead. My pulse rate must have reached 150 as the pour neared the top of the mold. I had thought the bottom would get a chance to solidify before the upper part was poured. The whole pour took less than 10 minutes, and I'm sure it was still quite molten at the bottom when they were through. I do like having a mold that weighs only 190 lbs instead of the 4,000 lb concrete one they had recommended to me. The lead is pre weighed and melted in a large vat with a hood to collect the fumes. The pour was made from buckets which were supported from a hoist arm. Each bucket contained about 300 lbs of lead.
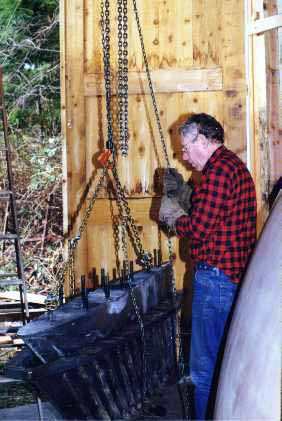
Removing the keel from mold was an anxious moment for me three days later. After the pour several people had asked was I really sure it wouldn't stick in the mold? I wasn't, and woke in the night with visions of having to chisel the steel away from the lead.
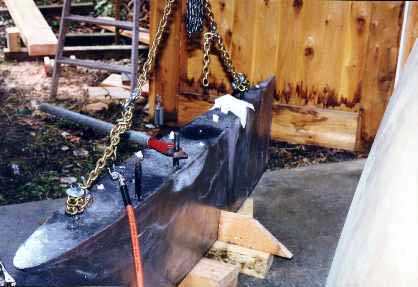
The keel came out perfect with no problems and at 2665 lbs, exactly what the plans call for. The dummy bolts backed out with the help of a cheater on the pipe wrench and the sodium silicate that I had coated them with before the pour. I had also used sodium silicate on all the welds, just to make sure they didn't leak. After removing the bolts, the keel was placed on a sheet of steel which is supported by 12" sections of 2" pipe. This allows it to be positioned anywhere on the concrete floor with very little effort.
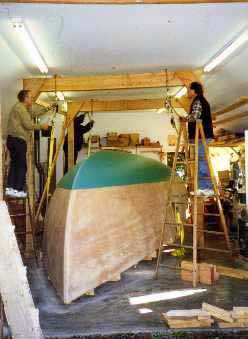
The rollover was accomplished in Feb 2000. That's me on the left with Larry on the ladder on the right at the bow end. We took up on the right side while letting down on the left. The cable hoists aren't rated for lifting, but since they are rated for 2,000 lbs each and there were four of them, and the hull was never more than a few inches off the floor, I didn't feel too concerned.

This is a view from the aft end just past the mid point of the rollover. Stan, on the ladder is out of cable, so we had to let down the aft end to shift the strap. Jim and David are off to the right, controlling the preventer lines so she wouldn't flop over in the straps.
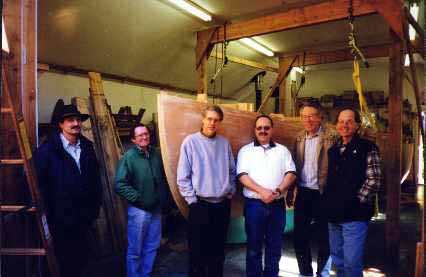
Here is the whole rollover crew with the hull. That's Scott Sprague, the designer on the left, Jim, David, Stan, me, and Larry.